
Table of Contents
- Top Offroad LED Light Brands Compared
- Nilight: Budget-Friendly Power for Every Trail
- Baja Designs: Purpose-Built UTV Lighting
- KC HiLiTES: Premium Systems for Serious Rigs
- Heretic: Aircraft-Grade Aluminum & Customizable Beams
- Nacho: Programmable Lights with Field-Swappable Covers
- Offroad Light Beam Patterns Explained
- How to Wire Offroad LED Lights
Last Updated: August 23, 2026
Top Offroad LED Light Brands Compared
Choosing the right offroad LED light brands can mean the difference between a safe, confident night run and a dangerous crawl through darkness. The market has exploded with options, but not all deliver when you're actually on the trail. The best offroad LED light brands balance three critical factors: actual light output in lumens and lux, durability under extreme vibration and temperature swings, and real-world beam patterns that match your driving style.
Quick Comparison Table
| Brand | Best For | Starting Price | Key Feature | Durability Rating |
|---|---|---|---|---|
| Nilight | Budget builds, complete kits | $105.95 | Spot/flood combo + pods | IP67 waterproof |
| Baja Designs | UTV-specific systems | $492.95 | 6,350 lumens, 5000K daylight | Limited lifetime warranty |
| KC HiLiTES | Premium Jeep/truck setups | $759.99-$2,999.98 | Gravity Titan systems, modular | Professional-grade |
| Heretic | Aircraft-grade durability | $134.99-$874.99 | CNC aluminum, customizable beams | IP68 rated |
| Nacho | Programmable, field-swappable | $439.99 | Output control module, J575 vibration rated | Lifetime warranty |
Nilight: Budget-Friendly Power for Every Trail
Nilight delivers genuine value without compromise. The Nilight 20 Inch 126W Spot Flood Combo LED Light Bar with four 18W pods is a complete system with everything needed to light up the night.
The combo beam design is the real win: a spot beam throws light 100+ meters down the trail while a flood beam illuminates terrain ahead and to the sides. The 8,820 lumens from the main bar covers most trail conditions, with four 18W flood pods adding 6,300 additional lumens on A-pillars, bumpers, or rock lights.
The 16AWG harness with high-temperature, melt-resistant insulation handles amperage draw without voltage drop issues. The IP67 waterproof rating with rubber pad and EVA strip sealing prevents corrosion after months of dust and water crossings. The 50,000-hour lifespan means you're not replacing this light in two years (energy.gov). The adjustable mounting bracket tilts up to 45 degrees, letting you dial in beam angle to match your roof rack height. Installation takes roughly two hours with included relay.
For weekend warriors and first-time LED buyers, the Nilight 20-inch combo kit at $105.95 is the best entry point into serious offroad lighting.
Baja Designs: Purpose-Built UTV Lighting
Baja Designs owns the UTV market because they engineer lights for UTV-specific abuse. The Baja Designs S8 10" Hood Mount LED Light Bar Kit for Polaris RZR Pro XP and RZR Turbo R is designed from the ground up for those platforms.
The S8 produces 6,350 lumens at 5000K daylight-balanced output. That 5000K color temperature matters: your eyes fatigue less during extended night driving, and natural color rendering helps you spot terrain changes (peer-reviewed research). The light draws just 4.0 amps, critical for UTVs with limited electrical headroom.
The ClearView optics technology directs every lumen where you need it. The CopperDrive system runs LEDs at 100% efficiency, and MoistureBlock waterproofing handles submersion. The hood mount kit bolts directly to OEM attachment points with zero fabrication in 30 minutes. The replaceable lens and optics system means you're not replacing the entire light if the lens cracks.
At $492.95, Baja Designs isn't budget, but for UTV-specific systems where fitment, electrical efficiency, and proven durability matter, Baja is the standard.
KC HiLiTES: Premium Systems for Serious Rigs
KC HiLiTES dominates the premium category because they've been building auxiliary lighting systems since before LED was viable. Their Gravity Titan systems represent the pinnacle of performance-focused design.
The KC HiLiTES FLEX ERA 4 LED 2-Light Master Kit Pod System at $759.99 is modular, professional-grade lighting with individually controllable spot, flood, or combo beams. For serious builds, the Gravity Titan Overhead LED Light Bar System for Jeep Wrangler JL and Gladiator JT at $2,999.98 transforms your rig with integrated overhead mounting.
KC HiLiTES lights endure because of superior construction: tighter tolerances, better heat dissipation, and stronger electronics. Thermal management keeps LEDs running at full brightness during extended use without dimming from heat. These lights perform on expedition vehicles spending months in remote backcountry. The downside: KC systems require professional installation on most vehicles and substantial cost. This is for builders who've invested in quality and aren't cutting corners.
Heretic: Aircraft-Grade Aluminum & Customizable Beams
Heretic builds lights like aerospace components. The 6 Series Light Bar uses USA-patented 6061 CNC-machined aircraft-grade aluminum housing with stainless steel mounts rated IP68.
The 30-inch Heretic bar with combo reflector at $749.99 delivers flexibility for different trail conditions. You can configure the beam as all spot for maximum distance, all flood for area lighting, or combo for versatility. Thirty 6-watt CREE LEDs produce serious output without thermal management issues.
The Heretic Quattro LED Light Pod at $134.99 is perfect for A-pillar or bumper mounting with four 6-watt CREE LEDs in a compact cube. Aircraft-grade aluminum and stainless steel hardware resist corrosion after years of salt spray and mud. The Heretic Tacoma Behind The Grill 30 Inch Bar in Amber at $874.99 is designed specifically for third-generation Tacomas with amber lens options for dusty conditions, producing 21,780 lumens with IP68 rating and 6188 lux specification.
What separates Heretic is customization and the ability to swap optics mid-season. The trade-off: Heretic doesn't include complete wiring harnesses.
Nacho: Programmable Lights with Field-Swappable Covers
Nacho gives users control over light behavior and makes everything field-swappable. The Grande 4 Hi and Grande 4 Lo at $439.99 each embody this approach, with Hi emphasizing spot optics for desert running and Lo prioritizing flood for technical terrain.
The Output Control Module is genuinely innovative. Program the light with multiple output settings using the included "Sorcery Wand" magnetic tool. Tap the light to cycle through modes: All On, Just Spot, Just Flood, or Area Lighting. The light remembers your settings across power cycles.
The polycarbonate exoskeleton housing features forced air induction for active cooling without fans, keeping LEDs at full brightness during extended use. The housing is replaceable, if damaged, swap the cover, not the entire light. The patented 2-N-1 Secured Grip Light Mount works on any tab or 1.5-inch tube without fabrication. Stainless steel hardware with UV-protected powder coat resists corrosion. The IP68 waterproof rating and J575 vibration rating handle serious abuse. Multiple cover options (Amber, Black, Smoke, Clear) let you customize without tools. The lifetime warranty backs electronics, and modular design means inexpensive repairs.
Offroad Light Beam Patterns Explained
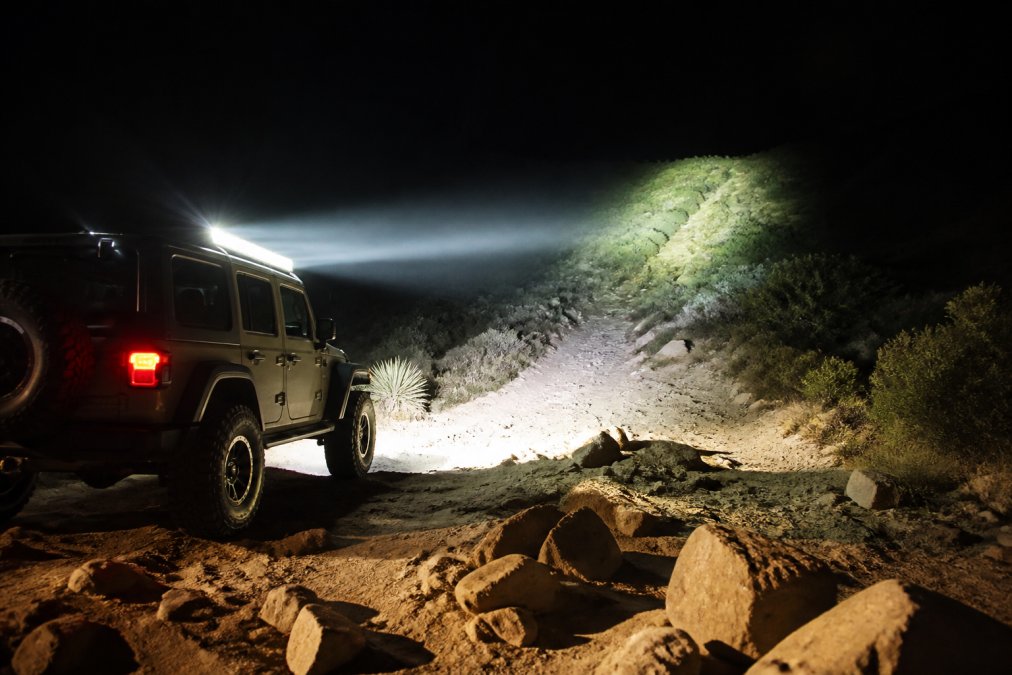
Understanding beam patterns is the difference between lights that illuminate your trail and lights that create useless glare. Offroad LED light brands engineer three distinct patterns.
Spot Beams for Distance
Spot beams concentrate light into a tight, focused cone that throws illumination far down the trail. A quality spot beam reaches 150+ meters, essential when moving at speed and needing to see obstacles before you're on top of them (sae.org). The beam angle is typically 10-15 degrees.
Spot beams are essential for highway sections and high-speed desert driving. The lux rating (light intensity at a specific distance) matters more for spot beams than lumens. Spot beams work best as primary forward-facing lights on roof racks or hood mounts, paired with flood beams for complete coverage.
Flood Beams for Coverage
Flood beams spread light across a wide area, typically 60-90 degrees. They produce lower lux ratings than spot beams because lumens are distributed across a larger area. But flood beams illuminate everything in front of you, terrain to the sides, obstacles at ground level, and the path immediately ahead.
Flood beams are essential for technical terrain where you're moving slowly. Color temperature matters significantly: warmer light (3000K) reduces glare in dust, while cooler light (6000K) improves clarity in clear conditions. Flood beams are typically mounted lower on the vehicle, A-pillars, bumpers, or rock light positions, to light terrain your wheels are about to contact.
Combo Beams for Versatility
Combo beams split the housing into spot and flood sections, delivering both throw distance and area coverage from a single light. Quality combo beams dedicate specific LEDs to each pattern: the spot section runs a subset through a tight reflector, while the flood section spreads remaining LEDs through a wider reflector.
Combo beams are versatile for mixed terrain where you transition between high-speed sections and technical crawling.
How to Wire Offroad LED Lights
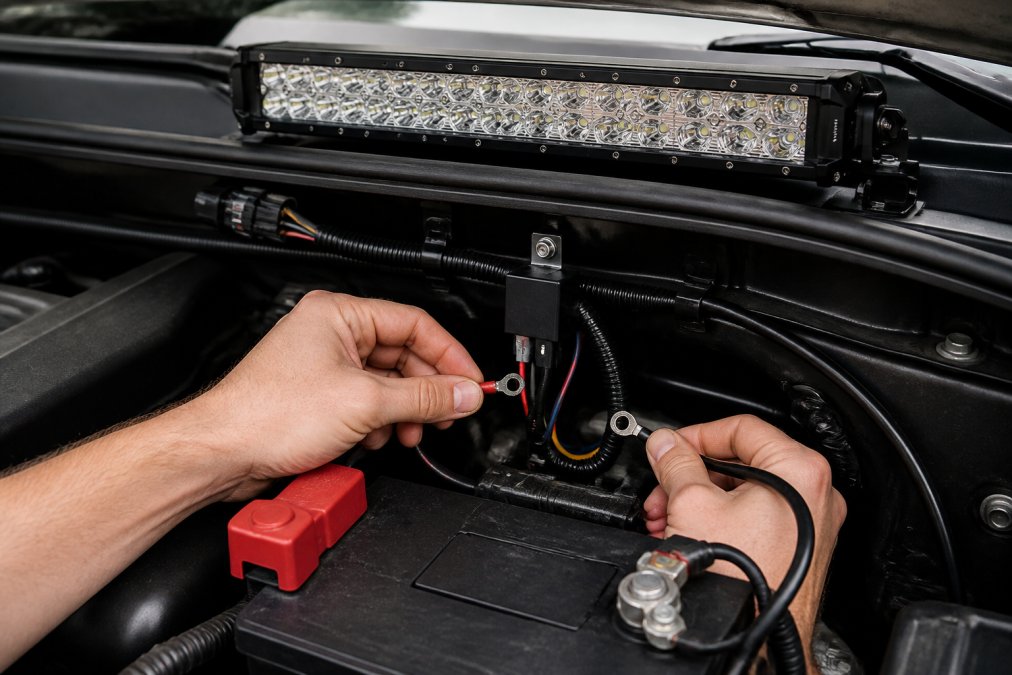
Wiring is where most DIY offroad LED light installations fail. The common mistake is running power directly from the battery through undersized wire to the light, then ground to the frame. Proper installation requires a relay, appropriately sized wire, and a switched circuit.
Wiring Harness Basics
A proper wiring harness includes four components: power wire from battery to relay, switched wire from ignition to relay trigger, output wire from relay to light, and ground wire from light back to battery negative or chassis ground.
The power wire (typically 4-8 AWG depending on amperage draw) runs directly from battery positive to the relay. A light drawing 20 amps requires 4 AWG wire minimum. The wire should include a fuse holder rated 20% higher than peak amperage, positioned within 18 inches of the battery.
The switched wire (typically 18 AWG) runs from your ignition switch to the relay trigger. This low-amperage wire only signals the relay to close, not power the light directly. The output wire from relay to light should match the power wire gauge. Run a dedicated ground wire from the light back to the battery negative terminal or a verified ground point on the engine block, stripping paint at the connection point and using a star washer to ensure metal-to-metal contact.
Relay Installation & Amperage Draw
The relay is the critical component most people underestimate. A relay is an electromagnet that switches high-amperage circuits using a low-amperage signal. When you press the switch, you trigger the relay coil (low amperage), which closes contacts carrying full power to the light (high amperage).
A 20-amp relay is rated for 20 amps continuous. If your light draws 25 amps at peak brightness, the relay will overheat and fail. Check your light's specifications for peak amperage draw.
Mount the relay in the engine bay close to the battery. Wire the relay with four terminals: 85 (relay coil ground), 86 (relay coil power from switch), 30 (power from battery), and 87 (output to light). Terminal 30 connects to battery positive through the fuse. Terminal 87 connects to the light. Terminal 86 connects to the switched source. Terminal 85 connects to ground. The fuse should be rated 20% higher than peak amperage and mounted within 18 inches of the battery.
Common DIY Wiring Mistakes
The most frequent mistake is running undersized wire to save money. A light drawing 20 amps on 10 AWG wire creates voltage drop that reduces output by 10-15% and creates fire risk.
The second mistake is running the switch directly to the light without a relay. This overloads switch contacts, creating resistance and heat. The switch fails within months, and the light dims as contact resistance increases.
The third mistake is inadequate grounding. Run ground to the battery negative terminal directly or to a verified ground point on the engine block with paint stripped and a star washer.
The fourth mistake is ignoring voltage drop calculations. Use the formula: voltage drop = (amps × feet × 2) / wire area in circular mils. For a 20-amp light on 30 feet, use 4 AWG wire to keep drop under 3%.
The fifth mistake is running power through interior switches. Your factory headlight switch is rated for 10-15 amps. Your 20-amp light will destroy it within weeks. Use a relay triggered by a low-amperage switch, or install a dedicated switch rated for your light's amperage.
Proper wiring takes an afternoon and costs $30-50 in materials.
Choosing the right offroad LED light brands means matching your rig's needs to a system that delivers in darkness. Precision Upgrades carries the top performers in this category, from budget-friendly Nilight 20-inch combo kits to professional-grade KC HiLiTES systems trusted by expedition builders. Each brand in this guide has proven itself on real trails under real conditions.
Shop our curated selection of offroad LED light brands and get started on your lighting upgrade today. New customers receive 15% off their first order with newsletter signup.
Frequently Asked Questions
Q: What makes one offroad LED light brand better than another?
A: Top offroad LED light brands differ in lumens output, beam pattern options, IP rating (water/dust resistance), thermal management, and durability under vibration. Nilight excels at value; Baja Designs delivers refined optics; KC HiLiTES builds premium systems; Heretic offers customizable beams; Nacho provides programmable output. Choose based on your vehicle type, budget, and how you plan to use the lights, high-speed desert runs need spot beams, while camp setup prioritizes flood coverage.
Q: How do I choose between spot, flood, and combo beam patterns for offroad lighting?
A: Spot beams throw light 200+ feet ahead, ideal for high-speed trail runs. Flood beams spread light 60-100 feet wide, perfect for camp setup and technical rock crawling. Combo beams blend both, offering versatility for mixed terrain. Most serious off-roaders run combo light bars plus separate flood pods for flexibility. Consider your typical speeds and terrain: desert runners favor spot-heavy combos; rock crawlers prefer flood-dominant setups.
Q: Is it difficult to install offroad LED lights myself, or do I need a shop?
A: Most offroad LED light kits are DIY-friendly if you're comfortable with basic wiring. A 16AWG wiring harness, relay, and switch are standard. The hardest part is routing wires cleanly and ensuring proper amperage draw so you don't overload your electrical system. Many kits include mounting brackets that bolt on without modification. If you lack electrical experience, a shop install typically costs $150-$300 labor. Pre-made kits like the Nilight combo ($105.95) simplify the process versus custom setups.
Q: What IP rating should I look for in offroad LED lights?
A: IP67 and IP68 ratings are standard for serious off-road lights. IP67 means dust-tight and can handle 30 minutes of submersion; IP68 is fully submersible and dust-proof. For rock crawling, water crossings, or dusty desert runs, IP68 is safer. All top brands, Nilight, Baja Designs, KC HiLiTES, Heretic, and Nacho, meet or exceed IP67. Check the product spec sheet; higher ratings ensure your lights survive mud, water, and sand without corrosion or moisture inside the lens.
Q: Will premium offroad LED light brands hold up to extreme conditions?
A: Yes, premium brands engineer for durability. Heretic uses aircraft-grade aluminum and polycarbonate lenses; Nacho meets J575 vibration standards and includes lifetime warranty; KC HiLiTES and Baja Designs use sealed optics and thermal management. Cheaper lights fail faster due to poor heat dissipation and lower component quality. For extended backcountry trips, invest in brands with proven track records, IP68 ratings, and warranties. Quality lights last 50,000+ hours; budget lights often fail within 2-3 seasons of heavy use.
This article was written using GrandRanker