
Table of Contents
- What Makes the Best Roof Rack Light Bar Mounting Brackets
- Universal vs. Vehicle-Specific Mounting Brackets
- Material Durability: Steel vs. Aluminum Construction
- No-Drill Light Bar Mounting Brackets: Installation Without Modification
- How to Wire an LED Light Bar to a Roof Rack
- Roof Rack Light Bar Wind Noise Reduction Strategies
- Maintenance and Long-Term Hardware Care
- Conclusion
Last Updated: August 19, 2026
What Makes the Best Roof Rack Light Bar Mounting Brackets
Choosing the right roof rack light bar mounting brackets transforms how you see the trail at night. The best brackets combine durability, ease of installation, and reliable load-bearing capacity, features that separate gear you'll trust for years from equipment that fails when you need it most.
At Precision Upgrades, we understand that mounting brackets are the foundation holding your auxiliary lighting system stable through rough terrain, high speeds, and extreme weather. A bracket that vibrates, loosens, or corrodes will compromise your light bar performance and create safety hazards.
The core difference between mediocre and exceptional brackets comes down to material selection, mounting geometry, and engineering precision. Steel offers raw strength and impact resistance. Aluminum provides weight savings without sacrificing durability when properly treated. The mounting system itself, whether universal or vehicle-specific, determines how securely your light bar stays positioned under stress.
This guide covers what separates the best roof rack light bar mounting brackets from the rest, including material comparisons, installation methods, wiring considerations, and maintenance habits that keep brackets performing for years.
Universal vs. Vehicle-Specific Mounting Brackets
Universal mounting brackets promise flexibility but create compromises that vehicle-specific brackets eliminate.
A true vehicle-specific bracket integrates with your truck or SUV's existing roof geometry. Mounting points align with structural reinforcements. Hardware routes through factory attachment points. The bracket sits flush against the roof profile, minimizing wind noise and aerodynamic disruption. Installation typically requires no drilling because the engineer designed it around existing features.
Universal brackets use adjustable pivot points and oversized mounting hardware to accommodate different roof shapes and crossbar diameters. This flexibility introduces gaps between bracket and roof surface, creating vibration during off-road driving that gradually loosens fasteners and damages components.
For serious off-road use, vehicle-specific brackets win every time. The Jeep Wrangler JK SS5 Sport CrossLink Windshield White Combo Lightbar Kit exemplifies this approach, engineered specifically for that platform with integrated mounting geometry that universal systems can't match.
If you're mounting a light bar on multiple vehicles or need maximum flexibility, universal brackets become practical despite their compromises. Just expect to invest in vibration dampening accessories and more frequent hardware maintenance.
Material Durability: Steel vs. Aluminum Construction
Steel and aluminum represent opposite approaches to bracket engineering, each with legitimate advantages depending on your use case.
Steel brackets offer superior impact resistance and tensile strength. They handle abuse without permanent deformation and resist corrosion when properly finished with powder coating or paint. Steel's density provides inherent vibration dampening. For extreme off-road conditions, steel brackets deliver peace of mind.
The downside is weight. Steel adds 8-12 pounds compared to aluminum, affecting fuel economy and handling dynamics. Steel also requires more aggressive corrosion protection because the base material rusts when finishes wear through.
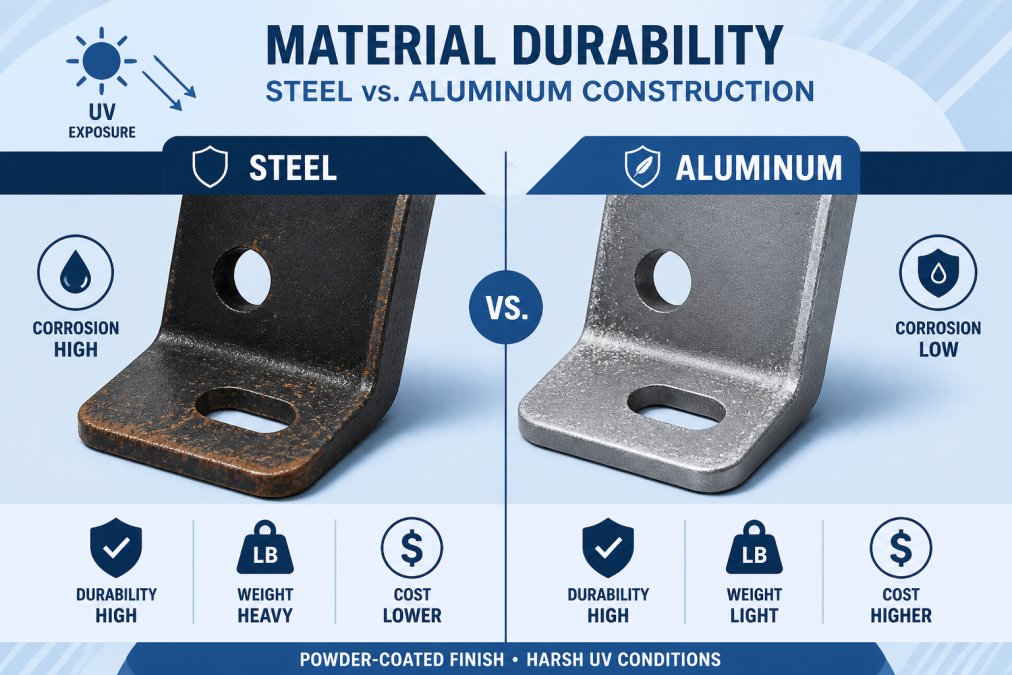
Aluminum brackets weigh 40-50% less than steel equivalents while maintaining adequate load-bearing capacity. Modern aluminum alloys achieve tensile strength approaching steel when properly heat-treated. Aluminum naturally resists corrosion through oxide layer formation. For vehicles where weight matters, aluminum makes sense.
Aluminum's weakness emerges under impact. A severe collision can bend aluminum brackets permanently. The material also transmits vibration more directly to mounted components, requiring additional dampening hardware.
Most premium brackets use powder-coated steel for maximum durability or anodized aluminum for weight savings. Precision Upgrades carries both approaches depending on the specific bracket model and vehicle platform. The KC HiLiTES Gravity Titan systems use heavy-duty steel construction optimized for serious overlanding, available for platforms from the Jeep Wrangler TJ through modern F-150 Raptors.
Choose steel if your vehicle sees regular extreme terrain and you prioritize longevity over weight. Choose aluminum if you're managing vehicle weight carefully and operate primarily on maintained trails.
No-Drill Light Bar Mounting Brackets: Installation Without Modification
No-drill mounting represents a major practical advantage. Traditional installations often required drilling through roof panels, creating permanent holes and potential water intrusion. No-drill brackets eliminate that risk entirely.
These brackets work by clamping to existing roof rack crossbars or using adhesive-backed mounting systems combined with mechanical fasteners. The bolt-on installation approach dominates because it provides maximum security without permanent vehicle modification.
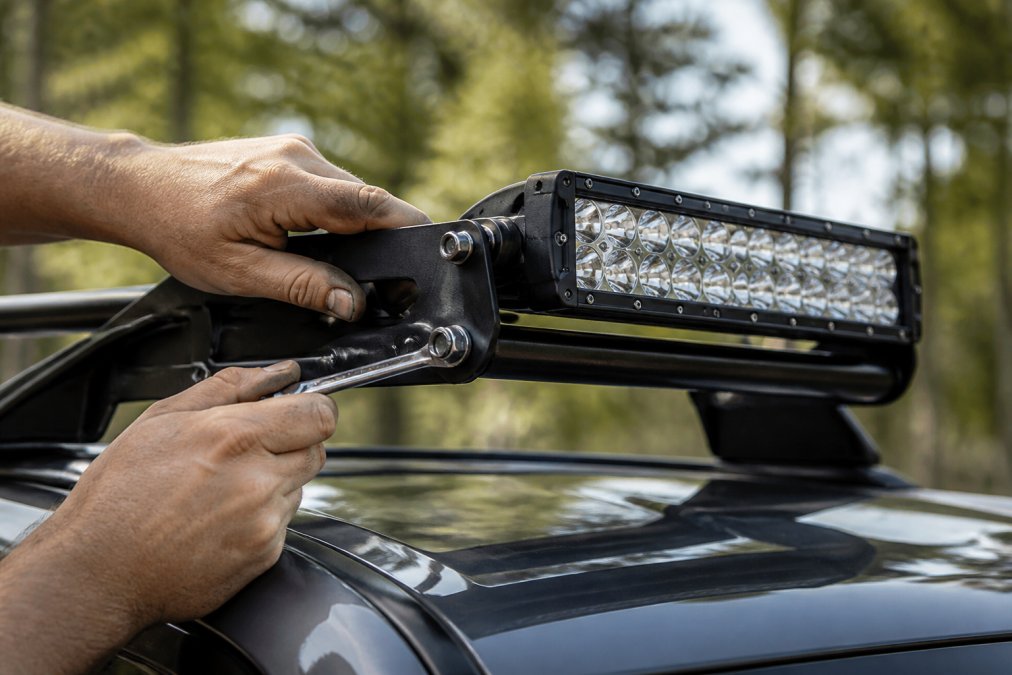
Installation typically takes 45-90 minutes. You position the mounting bracket against your roof rack, mark mounting holes using the bracket as a template, drill through the crossbar itself (not the vehicle roof), then insert stainless steel fasteners with nylon-locking nuts. No welding. No permanent modifications. If you later remove the light bar, the mounting holes in the crossbar are invisible under the bracket footprint.
Stainless steel fasteners matter here. Galvanized hardware corrodes when exposed to road salt and moisture. Stainless steel fasteners resist that corrosion, maintaining integrity for years. Quality brackets often include stainless hardware.
The no-drill advantage extends to resale value. You're not selling a vehicle with permanent roof modifications. You're selling a truck with removable accessories.
How to Wire an LED Light Bar to a Roof Rack
Wiring determines whether your light bar performs reliably or becomes a frustrating electrical headache.
Start with wire gauge selection. Your light bar's amperage draw determines the minimum wire size. A 6,350-lumen bar drawing 4 amps requires 10-gauge wire minimum. Larger bars drawing 8-10 amps need 8-gauge wire. Undersized wire creates voltage drop, reducing output and generating heat in the insulation.
Next, install a fused relay switch system. Never run power directly from the battery through a switch to the light bar. A relay acts as an intermediary, allowing a small switch to trigger a larger relay that handles the main power load. This protects your vehicle's electrical system and prevents voltage fluctuations that damage LED components.
Run power cables along the vehicle's existing wiring routes when possible. Avoid areas where the cable might contact sharp edges, moving parts, or hot surfaces. Secure cables with adhesive-backed clips every 12-18 inches to prevent wind noise and UV degradation.
Ground connections require special attention. The negative terminal should connect directly to the vehicle's chassis at a dedicated ground point. Clean the connection to bare metal, apply dielectric grease, and use a properly sized terminal lug. Corroded ground connections cause intermittent operation and mysterious electrical failures.
Many premium light bar kits include weatherproof connectors and pre-assembled wiring harnesses. The Baja Designs S8 10" Hood Mount LED Light Bar Kit for Polaris RZR comes with a complete wiring harness featuring sealed connectors and integrated switch, essentially connecting two plugs rather than running individual wires.
Test the system before final installation. Turn on the light bar with the engine off and measure voltage at the light bar terminals. You should read within 0.5 volts of your battery voltage.
Roof Rack Light Bar Wind Noise Reduction Strategies
Wind noise from poorly mounted light bars creates an annoying high-pitched whistle. The noise comes from air turbulence around the bracket and light bar housing.
Aerodynamic profile matters most. A light bar with a low-profile design and rounded edges creates less turbulence than one with sharp corners. The mounting bracket's geometry contributes significantly, a bracket that sits flush against the roof creates less disruption than one that stands proud of the surface.
Vibration dampening reduces noise transmission into the vehicle. Rubber isolators between the bracket and roof rack absorb oscillation before it travels through the vehicle structure. Quality brackets include elastomer dampening bushings at critical mounting points.
Bracket-to-roof contact area also affects noise. Larger contact surfaces distribute pressure more evenly and reduce vibration. Use adhesive-backed weatherstripping around the bracket perimeter to seal gaps and prevent water intrusion.
Check fastener tightness regularly. Loose hardware vibrates and amplifies noise. After your first 100 miles of driving, retighten all mounting bolts. Check again every 500 miles until fasteners stabilize.
Maintenance and Long-Term Hardware Care
Bracket longevity depends on maintenance habits more than initial quality.
Fastener inspection happens quarterly or after rough driving. Vibration loosens bolts gradually. Carry a socket set in your vehicle and tighten fasteners whenever you stop during road trips.
Corrosion prevention starts with hardware selection. Stainless steel fasteners resist rust far better than galvanized alternatives. After winter driving or coastal trips, rinse the entire bracket assembly with fresh water, paying special attention to crevices where salt accumulates.
Powder coating on steel brackets scratches during normal use. Touch up exposed steel immediately with cold-galvanizing spray paint to prevent rust from spreading.
Anodized aluminum brackets develop white oxide deposits in crevices. This is normal and doesn't indicate failure, but you can minimize it by regularly wiping brackets with a dry cloth.
Check light bar wiring annually. Examine connectors for corrosion and loose terminals. Look for wire insulation damage from UV exposure or abrasion. Replace any damaged sections immediately.
Mounting bracket alignment drifts over time due to vibration and thermal expansion. Every 12 months, verify that your light bar sits level and points straight ahead.
The best roof rack light bar mounting brackets combine intelligent engineering with practical durability. Vehicle-specific designs outperform universal options for serious off-road use. Steel offers maximum impact resistance while aluminum saves weight. No-drill installation protects your vehicle from permanent modification. Proper wiring ensures reliable operation. Attention to wind noise and regular maintenance keeps your system performing for years.
Precision Upgrades stocks KC HiLiTES Gravity Titan systems engineered for specific platforms, from the Jeep Wrangler JK through modern F-150 Raptors, each designed to integrate seamlessly with that vehicle's roof geometry. These aren't universal brackets adapted to fit your truck. They're purpose-built systems that handle serious overlanding demands. Shop Now and join our community of outdoor enthusiasts equipped for whatever the trail demands. Sign up for our newsletter to claim 15% off your first order.
Frequently Asked Questions
Can you mount a light bar to a roof rack?
Yes, you can mount a light bar to a roof rack using vehicle-specific or universal mounting brackets. The key is choosing brackets designed for your roof rack's crossbar diameter and your light bar's weight. Most quality brackets use laser-cut steel or aluminum with powder-coated finishes to resist corrosion. Ensure the bracket hardware includes stainless steel fasteners and that the mounting geometry distributes weight evenly across your roof rack perimeter for safe, stable installation.
What are the different types of mounting brackets for LED light bars?
LED light bar brackets fall into three main categories: universal brackets that fit most crossbars, vehicle-specific brackets engineered for particular truck or SUV models, and no-drill options that bolt onto existing roof racks without modification. Universal brackets offer flexibility but may require minor adjustments. Vehicle-specific brackets, like the KC HiLiTES Gravity Titan systems ($2,894.98-$3,112.48), provide precise chassis integration and optimal load-bearing capacity. No-drill brackets preserve your roof's integrity while delivering heavy-duty construction suitable for off-road performance.
How do I choose the right bracket size for my light bar?
Measure your roof rack's crossbar diameter (typically 1.5 to 2 inches) and verify your light bar's weight and length. Check the bracket's load-bearing capacity to ensure it supports both the light bar and wind resistance during highway driving. Match the bracket material to your environment, powder-coated steel offers superior impact resistance for rocky terrain, while aluminum provides lighter weight and corrosion resistance in wet conditions. Always verify vehicle-specific fitment before purchase, especially for models like the 2015 Toyota 4Runner or newer Jeep Wranglers.
What should I know about legal compliance when installing a roof light bar?
Check local and state regulations before installing auxiliary lighting. Some jurisdictions restrict light bar brightness, color (white or amber only in most states), and mounting height. Off-road-only light bars may be legal on trails but prohibited on public roads. Ensure your wiring harness includes a switch to disable lights when not off-roading, and verify that your vehicle's electrical system can handle the light bar's amperage draw without overloading. Many quality kits include weatherproofed wiring and fused connections for safety compliance.
This article was written using GrandRanker