
Table of Contents
- Why Customize Your Motorcycle for Off-Road Use
- Motorcycle Suspension Upgrades for Off-Road Performance
- Best Off-Road Tires for Dual Sport Conversion
- Motorcycle Skid Plate Installation and Protection
- Upgrade Your Lighting and Electrical Systems
- Exhaust, Air Intake, and Engine Tuning
- Legal Compliance and Safety for Off-Road Conversions
- Budget Breakdown: DIY vs. Professional Build
Last Updated: August 12, 2026
Why Customize Your Motorcycle for Off-Road Use
Stock street bikes struggle on gravel, mud, and rocky terrain. Customizing for off-road use fundamentally changes how your bike handles terrain, absorbs impact, and protects critical components. Suspension tuning transforms handling, better tires grip where factory rubber slides, skid plates protect engines from rocks, and upgraded lighting enables dawn and dusk riding. The seven upgrades covered here address suspension geometry, ground clearance, traction, protection, and visibility, each solving a specific problem that transforms a street-oriented machine into something genuinely capable off-road.
Motorcycle Suspension Upgrades for Off-Road Performance
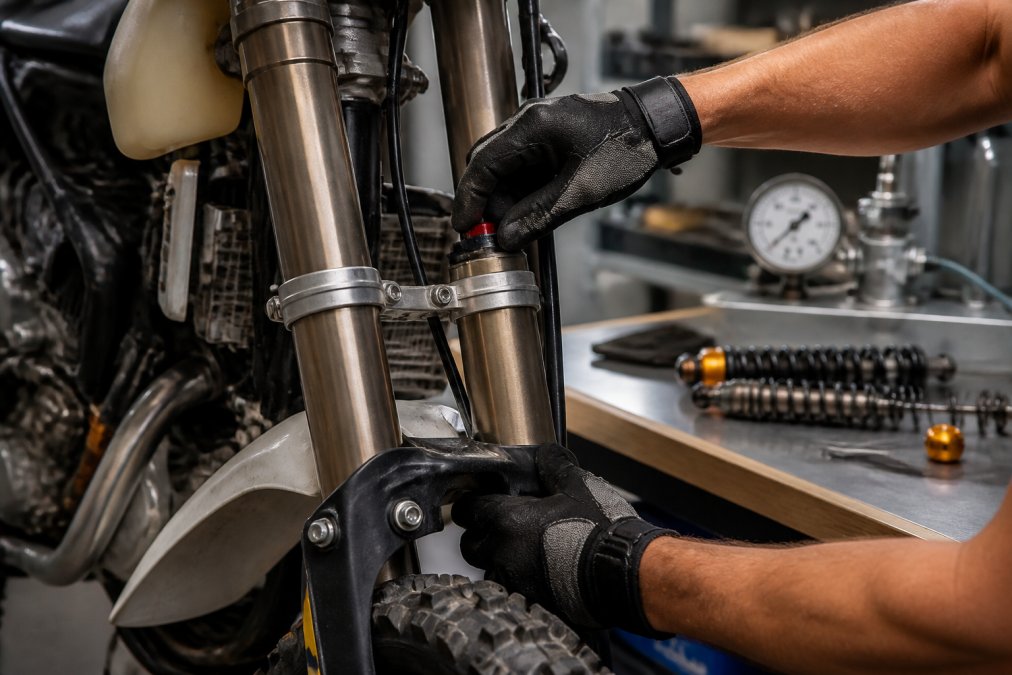
Suspension is where most riders see the biggest performance jump. Stock suspensions are tuned for smooth asphalt and compress too easily on bumpy terrain without providing enough travel to absorb impacts that define off-road riding.
Adjusting Preload and Damping
Preload is the initial spring compression before weight is on the bike. Damping controls how fast springs compress and extend. Both dramatically affect how your bike handles rough terrain.
Incorrect preload means your suspension either sits too low, losing ground clearance and bottoming easily, or too high, riding rough and losing traction. Set your bike's ride height so the chassis sits at the correct distance from the ground when seated, typically 1 to 1.5 inches of sag. Damping is equally important: compression damping controls how quickly suspension compresses when hitting a bump; rebound damping controls how fast it extends. Too much compression damping and the bike feels harsh, skipping across rocks. Too little and it wallows, losing control in corners.
Start with your suspension at stock settings. Sit on the bike in full riding gear and measure compression, that's your sag. Adjust preload incrementally to match your manual's target. Once preload is correct, small damping adjustments tune how the bike feels on different terrain. This tuning process costs nothing and often delivers better results than expensive new components.
Increasing Suspension Travel
Stock suspension travel on street bikes ranges from 4 to 6 inches front and rear. Off-road terrain demands more. Rocks, roots, and ruts compress suspension deeply; if it bottoms out, you're hitting the frame hard.
Increasing suspension travel requires longer shocks or fork tubes designed for more travel. Quality off-road suspension kits extend travel to 8 to 10 inches or more, giving you the buffer needed for genuine terrain. This represents a significant investment, but riders tackling rocky terrain, river crossings, or heavily rutted trails find it essential.
Best Off-Road Tires for Dual Sport Conversion
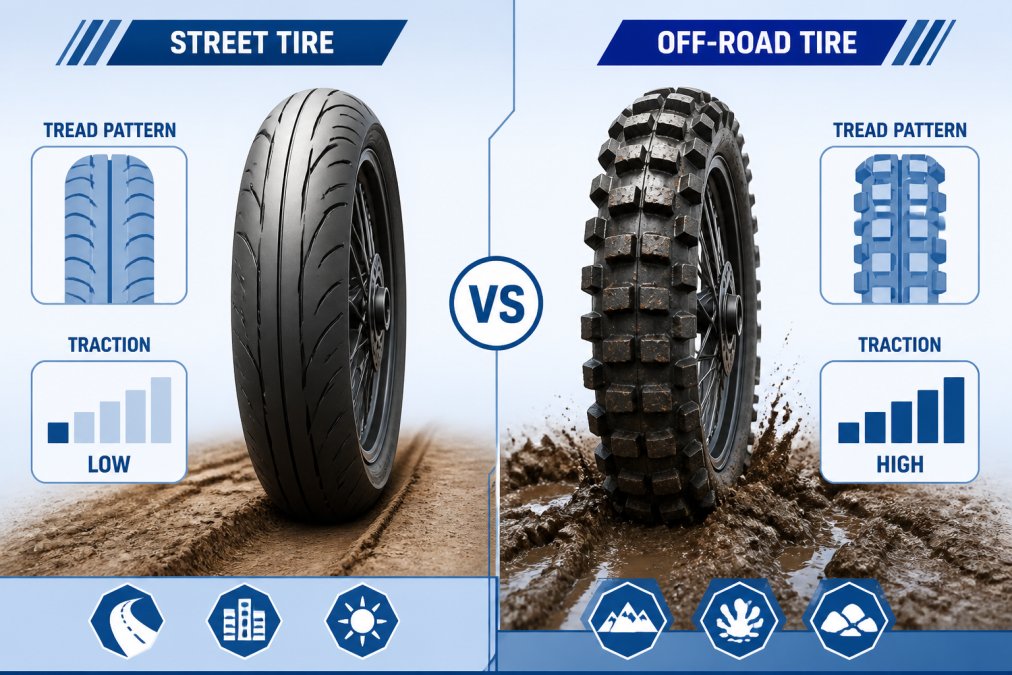
Tires are where your bike meets the ground. Stock street tires are designed for asphalt with continuous tread optimized for water evacuation. On dirt, those tires slide and don't bite into loose material.
Off-road tires feature knobby patterns with discrete blocks separated by open space. Those blocks dig into soil and sand, providing traction street tires can't match. The spacing allows mud and debris to clear instead of packing in and creating a slick surface.
Knobby Tire Selection and Tread Patterns
The best off-road tires for dual sport conversion balance aggressive grip with stability on pavement if you're still doing street riding. Tread pattern matters more than brand. Look for tires with blocky lugs arranged to provide edge grip in corners and bite in straight-line traction. Read reviews from riders doing the same terrain you plan to tackle, a tire optimized for hard-packed desert might feel disconnected in muddy forest conditions.
Tire compound affects performance: harder compounds last longer but provide less grip; softer compounds grip better but wear faster. Most dual-sport tires strike a middle ground, sacrificing ultimate grip for durability. Larger knobs with wider spacing provide maximum traction in soft terrain like sand and mud but create harsher ride and more vibration. Smaller knobs with closer spacing feel more comfortable on harder surfaces but sacrifice ultimate traction in really loose conditions.
Tire Pressure and Ground Clearance
Off-road riding demands lower tire pressure than street riding. While street bikes typically run 32 to 36 PSI cold, off-road riding often requires 15 to 22 PSI depending on terrain and bike weight. Lower pressure increases the tire's contact patch, improving traction and allowing the tire to conform to irregular surfaces.
The trade-off is heat buildup and potential tire damage. Run too low and the tire flexes excessively, generating heat that can cause failure. The correct pressure depends on terrain, bike weight, rider weight, and tire construction. Rocky terrain demands higher pressure than sand; heavier riders need higher pressure than lighter ones.
Ground clearance, the distance from the lowest point of the bike to the ground, determines whether you'll high-center on rocks or logs. Better tires and suspension naturally improve clearance. Larger diameter tires raise the chassis; increased suspension travel keeps the frame higher when compressed. Together, these changes might add 2 to 3 inches of clearance, which is significant in rocky terrain.
Motorcycle Skid Plate Installation and Protection
Engine cases are expensive and vulnerable. A single rock at the wrong angle can crack an engine case, destroying the bike. Skid plates are the cheapest insurance you can buy.
A skid plate is a metal or reinforced plastic shield that mounts under the engine, protecting the crankcase, transmission case, and oil pan from impacts.
Choosing the Right Skid Plate Material
Aluminum skid plates are lightweight and strong, ideal for most riders. They dent easily but rarely crack and are easily repaired or replaced if damaged. Aluminum also dissipates heat better than plastic, keeping the engine cooler during technical riding.
Steel skid plates are heavier but more durable, absorbing harder impacts without deforming. For bikes that already sit low or riders tackling extreme terrain, steel is worth the extra weight. Reinforced plastic skid plates are the lightest option but offer the least protection. Most riders find aluminum provides the best balance of protection, weight, and cost.
Installation Steps and Mounting Hardware
Skid plate installation is straightforward and requires basic tools. Most skid plates bolt directly to the frame or engine mounting points using existing holes or new holes you'll drill.
Remove any fairings or bodywork blocking access. Clean the mounting surface and identify where the skid plate bolts attach. Drill mounting holes if necessary, then align the skid plate and insert bolts. Use lock washers and threadlocker on all fasteners, vibration from off-road riding will loosen bolts quickly without them. Check clearance between the skid plate and any moving parts like the kickstand or suspension components. The entire installation typically takes 30 to 60 minutes.
Upgrade Your Lighting and Electrical Systems
Stock motorcycle lighting is designed for road use. Headlights illuminate straight ahead at highway speeds; turn signals are small and dim. Off-road riding, especially at dawn, dusk, or in overcast conditions, demands better lighting.
Upgraded LED lighting makes you visible to others and lets you see the trail ahead. The Nilight Motorcycle Driving Lights 2.5 Inch White Amber Spot Beam Fog Light LED Pods from Precision Upgrades delivers both. The white spot beam cuts through darkness and fog, while the amber fog beam penetrates rain and dust. At $38.95, they're an affordable upgrade that dramatically improves visibility on technical terrain.
Consider adding a rocker switch to control auxiliary lights independently. The Nilight 2Pcs 5Pin Laser On/Off Led Light Bar Rear Lights Rocker Switch Blue ($28.95) lets you toggle lights on or off without cycling your main headlight, preserving battery life and giving you granular control over what's illuminated.
If you're adding electronic accessories, the Nilight Motorcycle SAE to Dual USB Car Charger Adapter ($32.95) provides Quick Charge 3.0 fast charging on two USB ports, letting you power devices simultaneously without draining your battery.
Exhaust, Air Intake, and Engine Tuning
Engine modifications come later in the priority list, behind suspension, tires, and protection, but they matter for performance.
Stock exhaust systems are designed for noise compliance and smooth power delivery. They're often heavy and restrictive. Aftermarket off-road exhausts reduce weight and improve flow, freeing up horsepower and torque. More importantly, they shift power delivery toward mid-range torque, the ability to accelerate hard from low RPMs, which is more useful on trails than peak horsepower.
Air intake modifications follow the same logic. Stock air filters restrict flow to manage noise and protect the engine. Upgrading to a performance air filter increases airflow, improving combustion efficiency. The gains are modest, perhaps 3 to 5 percent power improvement, but combined with exhaust changes, the cumulative effect is noticeable.
Engine tuning through ECU reprogramming is possible on modern bikes with fuel injection. A tune optimized for off-road riding adjusts fuel mapping for better throttle response and optimizes ignition timing for the RPM ranges you use on trails. Professional tuning costs $300 to $800 but delivers consistent, measurable results.
Legal Compliance and Safety for Off-Road Conversions
If your bike is registered as street-legal, modifications must comply with applicable regulations. Lighting must meet DOT standards, exhaust must comply with EPA noise and emissions limits, and the bike must pass safety inspections.
Off-road-only bikes are exempt from many regulations. If you're converting a street bike to off-road-only use, you can remove lighting and modify exhaust freely. But if you plan to ride the bike on public roads, even occasionally, you must maintain street-legal compliance. Before starting modifications, check your state's vehicle code or contact your DMV.
Beyond legality, safety is paramount. Off-road riding is inherently risky. Protective gear, helmet, goggles, gloves, boots, body armor, is non-negotiable. Your bike modifications should enhance protection: skid plates prevent engine damage, better tires improve grip and reduce crashes, upgraded suspension keeps the bike stable.
Test modifications incrementally. Don't overhaul your entire bike and hit difficult terrain on the first ride. Make changes, ride familiar terrain, get comfortable, then progress to more challenging conditions.
Budget Breakdown: DIY vs. Professional Build
The cost of customizing your motorcycle for off-road use ranges from a few hundred dollars to several thousand, depending on how far you push modifications.
A budget-conscious build focuses on essentials: tires, skid plate, basic lighting, and suspension tuning. This approach costs $800 to $1,500 and addresses core gaps in stock off-road capability.
A mid-range build adds aftermarket suspension components, upgraded lighting with multiple light pods, exhaust modifications, and air intake work. This tier runs $2,000 to $4,000 and often involves professional installation for suspension and tuning.
A professional build, full suspension overhaul, engine tuning, custom fabrication, professional installation, costs $5,000 to $10,000 or more. Prioritize suspension and tires first, they deliver the most noticeable improvement per dollar spent. Protection comes next. Engine modifications and advanced upgrades follow. Building incrementally lets you spread costs and learn your bike's capabilities as you add upgrades.
| Upgrade Category | Budget Build | Mid-Range Build | Professional Build |
|---|---|---|---|
| Tires & Wheels | $300-500 | $400-600 | $600-900 |
| Suspension | $0 (tuning only) | $800-1,500 | $2,000-3,500 |
| Skid Plate | $150-250 | $200-350 | $300-500 |
| Lighting | $100-200 | $300-500 | $500-800 |
| Exhaust & Air | $0 | $400-600 | $800-1,200 |
| Installation Labor | $0 (DIY) | $300-600 | $1,500-3,000 |
| Total Cost | $550-950 | $2,400-4,150 | $5,700-9,900 |
Customizing your motorcycle for off-road use doesn't require spending thousands or professional fabrication. Strategic upgrades to suspension, tires, protection, and lighting transform a street bike into a capable trail machine. Start with the fundamentals, suspension tuning, quality off-road tires, and a skid plate, then add lighting and engine work as budget allows. At Precision Upgrades, we stock the LED lighting and electrical components that make your upgrades complete. The Nilight Motorcycle Driving Lights and rocker switches we carry are built for trail durability and deliver the visibility you need in challenging conditions. Shop our collection and get 15% off your first order with newsletter signup.
Frequently Asked Questions
What are the essential modifications for off-road motorcycle conversion?
Start with suspension upgrades (preload, damping, fork oil viscosity), install knobby off-road tires with proper ground clearance, add a skid plate to protect the frame, and upgrade lighting for trail visibility. Then address air intake and exhaust modifications to improve torque delivery on uneven terrain. Each upgrade builds on the last to shift your motorcycle's weight distribution and chassis geometry toward off-road capability.
Can you turn a cruiser into an off-road motorcycle?
Yes, but with limitations. Cruisers have low ground clearance and heavy weight distribution that makes them challenging for serious trail riding. You can upgrade suspension travel, install skid plates, and fit knobby tires, but the wheelbase and center of gravity will still restrict your off-road performance compared to a dual-sport bike. Budget $1,500-$3,000 for meaningful conversion on a cruiser; dual-sports require less work.
How do you improve ground clearance on a custom motorcycle?
Raise your bike by increasing suspension travel through longer shocks or fork springs, and adjusting preload to lift the chassis. Install handlebar risers to shift weight forward and reduce nose-dive under braking. Swap to smaller-diameter wheels if needed, and ensure your skid plate and bash guard don't hang lower than the frame. These changes together improve approach and departure angles on trails.
What maintenance schedule should I follow after modifying my motorcycle for off-road use?
Check fork oil viscosity and damping settings every 500 miles; inspect skid plates and bash guards for damage after each ride. Replace air filter every 200 miles in dusty conditions, check chain tension and sprocket gearing weekly, and monitor brake pad compound wear monthly, off-road braking is harder on pads. Service suspension components annually, and inspect frame stress points where custom fabrication was done every 1,000 miles.
This article was written using GrandRanker