
Table of Contents
- What You'll Need to Install Offroad LED Lights
- Planning Light Placement and Illumination Pattern
- Step 1: Disconnect the Battery and Prepare
- Step 2: Choose Your Offroad LED Light Mounting Options
- Step 3: Run Wiring Through the Firewall Grommet
- Step 4: Install the Wiring Harness and Relay Setup
- Step 5: Connect LED Pods and Test Illumination
- Waterproofing, Corrosion Prevention, and CANbus Integration
How to Install Offroad LED Lights: Step-by-Step
Last Updated: July 27, 2026
Installing offroad LED lights transforms your vehicle's capability on the trail and enhances visibility in low-light conditions. This guide from Precision Upgrades covers how to install offroad led lights with practical, step-by-step instructions that work for trucks, SUVs, and motorcycles. Whether you're planning a weekend backcountry trip or serious overlanding expedition, proper LED light installation ensures reliable illumination when you need it most. Below, we'll show you exactly how to mount, wire, and integrate LED pods into your vehicle's electrical system, from disconnecting the battery through final testing.
DIY installation saves significant money while giving you complete control over your lighting setup. The process requires attention to electrical safety and proper grounding, but it's entirely manageable for someone with basic mechanical skills. Offroad LED systems have specific demands around waterproofing, voltage protection, and CANbus integration that standard automotive lighting doesn't address.
What You'll Need to Install Offroad LED Lights
Tools and Materials Required
You'll need basic hand tools: a socket set (10mm through 13mm sockets), wire strippers, crimpers, a multimeter for testing voltage, and a flashlight for working in engine bays. A heat gun helps with heat shrink application, and diagonal cutters trim excess wire cleanly.
Materials are equally important. Purchase a quality wiring harness with inline fuse protection, appropriately-sized wire gauge (typically 10 AWG or 12 AWG depending on amperage draw), a relay to handle the load, a toggle switch for manual control, and dielectric grease to prevent corrosion at all connection points.
Waterproofing materials are essential: IP67-rated connectors, heat shrink tubing, silicone sealant, a firewall grommet, wire loom, and cable ties.
Understanding Your Vehicle's Electrical System
Your vehicle's electrical system operates at 12 volts (or 24V in some diesel trucks) with specific amperage limitations. The alternator generates power, the battery stores it, and the fuse block distributes it through circuits.
Modern vehicles increasingly use CANbus systems, a network that communicates between modules and manages everything from engine timing to lighting. Adding auxiliary lighting without understanding CANbus integration can trigger warning lights or disable features. Some vehicles require a CANbus-compatible relay module that communicates with the vehicle's computer rather than a simple mechanical relay.
Ground terminals are critical. A poor ground connection causes voltage drop, reduces LED brightness, and can damage components. The ground must connect directly to the vehicle's chassis or battery negative terminal using properly-sized wire and a secure, corrosion-free connection.
Planning Light Placement and Illumination Pattern
Map out exactly where your LED pods will mount before drilling holes. Spot beam lights concentrate light in a narrow pattern for distance visibility, ideal for high-speed trail running. Flood beam lights spread illumination across a wider area, better for technical rock crawling.
Most overlanders mount lights in progressive layers: main headlights at the top of the windshield frame or bumper, auxiliary spot beams higher on the roof rack or A-pillar, and flood beams lower on the bumper or fender flares. This layered approach prevents dark spots and gives flexible illumination options.
Consider your vehicle's electrical load capacity. LED pods typically draw 15-40 amps depending on output. A vehicle with a 120-amp alternator can safely support auxiliary lighting. Calculate total amperage if adding multiple light bars and verify your alternator can handle it.
Test mounting locations before committing. Use temporary brackets or suction cups to see how light patterns perform on a night drive.
Step 1: Disconnect the Battery and Prepare
Disconnect the negative terminal of your battery using an appropriately-sized wrench. This prevents accidental shorts. Wait a few minutes, as some vehicle systems retain power briefly after disconnection.
Gather all materials and tools within arm's reach. Locate your vehicle's fuse block, typically under the hood near the battery. Identify an available circuit or plan to tap into an existing circuit with sufficient amperage. Read your vehicle's service manual to understand the electrical layout and which circuits are live when the ignition is off.
Step 2: Choose Your Offroad LED Light Mounting Options
Mounting bracket selection depends on your vehicle's design and desired light position. Roof rack mounts work well for vehicles with existing racks and provide excellent height for spot beams. A-pillar mounts bolt to the windshield frame and sit higher than bumper mounts. Bumper-mounted brackets integrate lights into the front bumper design and look cleaner.
Verify that your mounting brackets are rated for the weight and vibration of your specific light pods. Test fit the bracket and lights before drilling any holes. Mark mounting locations with tape or a marker, ensuring lights point straight ahead or slightly downward.
Step 3: Run Wiring Through the Firewall Grommet
The firewall grommet is a rubber seal that prevents water, dust, and rodents from entering the engine compartment. Most vehicles already have a grommet installed; push your wiring through it. If your vehicle lacks a suitable grommet, purchase one that fits your wiring bundle diameter.
Measure the distance from your light mounting location to the battery, accounting for the path the wiring will take. Avoid hot engine components, moving belts, and sharp edges. Feed your positive and negative wires through the firewall grommet into the engine bay, working slowly to avoid damaging wire insulation.
Route wiring along existing harnesses using wire loom and cable ties. Avoid routing wires directly against hot surfaces like the exhaust manifold. Maintain at least 2 inches of clearance from any moving component.
Step 4: Install the Wiring Harness and Relay Setup
The wiring harness is the backbone of your LED system. It contains the relay, inline fuse, and switch connections. Start at the battery by connecting the positive wire from the harness to the positive battery terminal using a battery terminal clamp or lug connector. Secure the connection tightly.
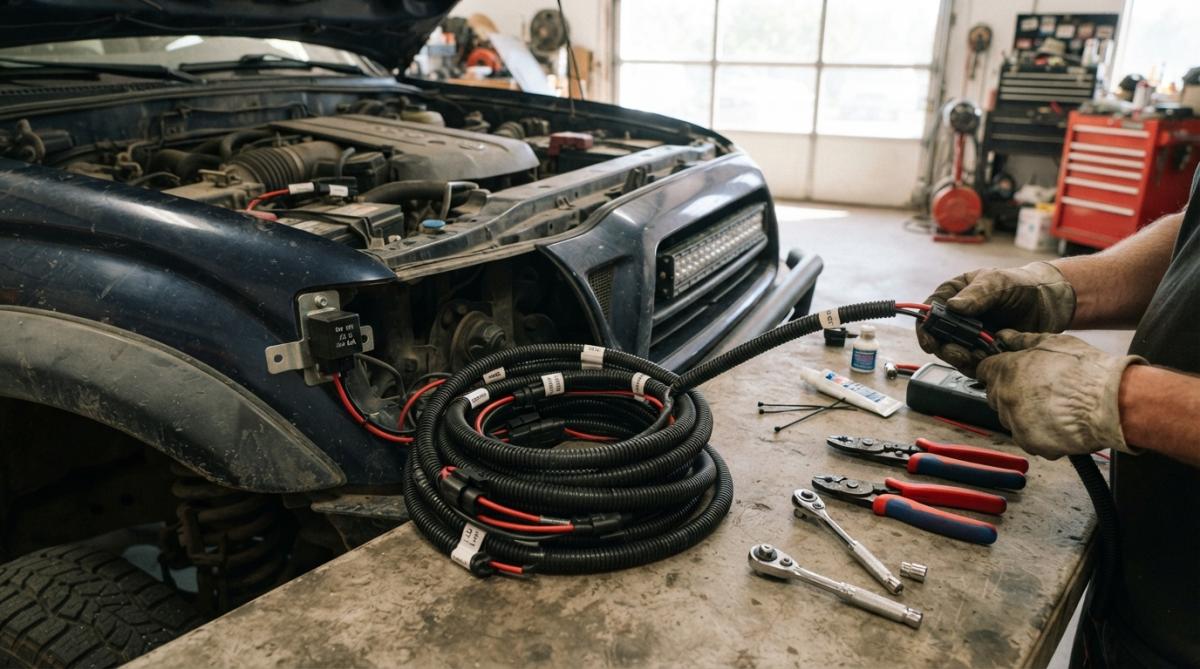
Run the negative wire to a clean ground point on the vehicle's chassis. Strip away paint or corrosion to expose bare metal, then secure the ground lug with a bolt and washer. Apply dielectric grease to prevent future corrosion.
Relay and Switch Installation
Mount the relay on the fender or inner fender panel using a relay bracket, positioned close to the battery within 3-4 feet to minimize voltage drop. Connect the relay terminals according to your wiring diagram: terminal 30 (battery positive), 85 (ground), 86 (signal from switch), and 87 (output to lights).
Mount the toggle switch inside the cabin where you can reach it easily. Many overlanders mount switches on the dashboard, A-pillar, or center console. Run the signal wire from the switch to relay terminal 86.
Connecting to Battery Terminals
Battery terminal connections must be absolutely secure. Use marine-grade terminal lugs that are crimped, not soldered, onto the wire. Crimp using a proper crimper tool, not pliers. Apply dielectric grease inside the lug before sliding it onto the battery terminal.
Tighten the battery terminal bolt firmly but don't over-tighten. The connection should be immobile when you try to wiggle the wire. Install an inline fuse holder within 18 inches of the positive battery terminal, sized for your light's amperage (typically 40-60 amps for multiple LED pods).
Step 5: Connect LED Pods and Test Illumination
Route the positive and negative wires from the relay to each LED pod location. Wire lights in parallel (all positive wires together, all negative wires together) so each light gets full voltage.
Connect the LED pod wires using DT connectors or weatherproof connectors designed for offroad use. Apply dielectric grease to every connection point. This creates a moisture barrier that prevents corrosion.
Reconnect the negative battery terminal. Turn on the ignition and flip your LED light switch. The lights should illuminate immediately with full brightness. If dim, check for loose connections or voltage drop.
Use your multimeter to measure voltage at each light connection. You should see approximately 12 volts (or 24 volts in diesel trucks). Anything below 11 volts indicates a connection problem or excessive wire length.
Drive the vehicle at night to test illumination patterns. Spot beams should create a concentrated beam 100+ feet ahead. Flood beams should light the area immediately in front and to the sides. Adjust bracket angles if needed to optimize coverage.
Waterproofing, Corrosion Prevention, and CANbus Integration
Offroad environments expose electrical connections to mud, water, salt spray, and temperature extremes. Waterproofing is essential for reliability.
Seal every connector with dielectric grease and heat shrink tubing. Apply heat shrink over the crimped connection, then shrink it with a heat gun or lighter. For connections exposed to water, use silicone sealant in addition to heat shrink.
Check your connections every 6 months, especially after extended wet-weather driving. Tighten any loose connections and reapply grease as needed.
Modern vehicles with CANbus systems require special consideration. Adding high-amperage auxiliary loads can confuse the vehicle's computer, causing dimmed headlights, disabled features, or warning lights. If this happens, you need a CANbus-compatible relay module that communicates with the vehicle's computer to prevent conflicts.
Precision Upgrades specializes in LED lighting systems designed for popular overlanding vehicles. Their installation kits include CANbus-compatible relays for vehicles that require them, sealed connectors, and dielectric grease pre-applied to connections. The kits feature detailed vehicle-specific instructions and have been tested across dozens of truck and SUV models.
Installing offroad LED lights properly takes 4-6 hours but delivers years of reliable trail visibility. The real challenge is ensuring every connection stays corrosion-free in harsh conditions. Precision Upgrades LED lighting kits include sealed connectors, CANbus integration for compatible vehicles, and comprehensive wiring diagrams matched to your specific vehicle model. Shop Now and get equipped for your next adventure with confidence that your lighting won't fail halfway through the backcountry.
Frequently Asked Questions
What tools and materials do I need to install offroad LED lights?
You'll need basic hand tools (socket set, screwdrivers, wire strippers, crimper), a wiring harness kit, relay and fuse block, inline fuse holders, heat shrink tubing, dielectric grease, wire loom, and the LED pods themselves. Depending on your vehicle, you may also need a firewall grommet, mounting brackets, and a toggle switch. Most installation kits bundle these components together, simplifying the process for DIY installers.
How do I wire offroad LED lights with a relay to prevent voltage drop?
A relay pulls power directly from the battery rather than through existing vehicle circuits, preventing voltage drop that can dim your lights. Run a dedicated wire from the positive battery terminal through an inline fuse to the relay's input. The relay's output connects to your LED pods, while a separate switch wire triggers the relay. This configuration ensures proper amperage delivery and protects your vehicle's electrical system from overload.
Are offroad LED lights legal for street use in the United States?
Offroad-only LED lights are not DOT-approved for public roads. However, many states permit auxiliary lighting for off-road use only. Spot beam and flood beam patterns must not blind oncoming traffic if used on streets. Check your state's specific regulations, some allow auxiliary lights if they're wired to disable on public roads. Precision Upgrades can help you select lights compliant with your local requirements.
What's the best way to prevent moisture and corrosion when installing offroad LED lights?
Use dielectric grease on all electrical connections to block moisture and prevent corrosion. Ensure your LED pods have an IP67 rating for water resistance. Apply heat shrink tubing over crimped connections, seal the firewall grommet properly, and route wiring through protective wire loom. Inspect connections annually and reapply dielectric grease if needed. Proper waterproofing is critical for reliable performance on trails where moisture exposure is inevitable.
This article was written using GrandRanker