
Table of Contents
- Why Off-Road Gear Maintenance Matters for Trail Performance
- Pre-Trip Inspection: Your Off-Road Vehicle Maintenance Checklist
- How to Clean 4x4 After Mud and Trail Debris
- Off-Road Suspension Maintenance Schedule and Best Practices
- Essential Off-Road Repair Tools and Maintenance Kit
- Personal Gear Care: Helmets, Boots, and Recovery Equipment
- Long-Term Storage Protocols for Off-Season Gear
- Repair vs. Replace: When to Fix or Upgrade Your Gear
Last Updated: August 5, 2026
Why Off-Road Gear Maintenance Matters for Trail Performance
Maintaining off-road gear ensures your vehicle and equipment perform reliably when you need them most. Off-road environments present unique challenges: mud cakes into undercarriages, water corrodes suspension components, and trail debris damages protective gear. Without a structured maintenance routine, wear accelerates exponentially. Regular maintenance catches small issues before they become catastrophic failures, extends the lifespan of expensive components, and maintains structural integrity.
Pre-Trip Inspection: Your Off-Road Vehicle Maintenance Checklist
Before every trail run, conduct a thorough pre-trip inspection of your 4x4 systems. This checklist catches problems while you're still in civilization, not stranded miles from help. A comprehensive inspection typically takes 30-45 minutes and covers suspension, drivetrain, fluids, and tires.
Suspension and Drivetrain Checks
Your suspension system absorbs impact and keeps your rig stable on uneven terrain. Before heading out, inspect shocks, struts, and bushings for visible damage, leaks, or unusual movement.
Check each shock and strut for oil seepage around the rod. Light seeping is normal; active dripping means replacement is near. Grab the tire at the 3 and 9 o'clock positions and try to move it side to side. Excessive play indicates worn tie rods or ball joints. Look under the vehicle for cracked or broken bushings, rubber components that connect suspension parts.
Inspect the drivetrain for torn CV boots, check differential fluid levels, and ensure all bolts securing the driveshaft are tight. Listen for clunking sounds when shifting between drive and reverse, indicating worn universal joints or mounting issues.
Fluid Levels and Tire Condition
Check engine oil with the dipstick on level ground with the engine cold. Coolant should be at the full mark; low coolant suggests a leak. Brake fluid should be near the maximum line; low brake fluid indicates worn pads or a leak, both critical safety issues.
Check tire pressure when tires are cold. Many overlanders reduce pressure slightly for trail work; consult your vehicle's manual for recommended off-road pressures. Inspect tread depth with a penny: insert it upside down into the groove. If you see the top of Lincoln's head, tread is too worn. Tread depth of at least 6/32 inch is recommended for off-road use.
Look for sidewall damage, bulges, or embedded objects. Check that all lug nuts are tight and spare tire pressure is adequate.
How to Clean 4x4 After Mud and Trail Debris
Mud and trail debris coat your vehicle after a run. Cleaning prevents corrosion before it starts. Dried mud traps moisture against metal surfaces, accelerating rust. Clean within 48 hours of returning from the trail.
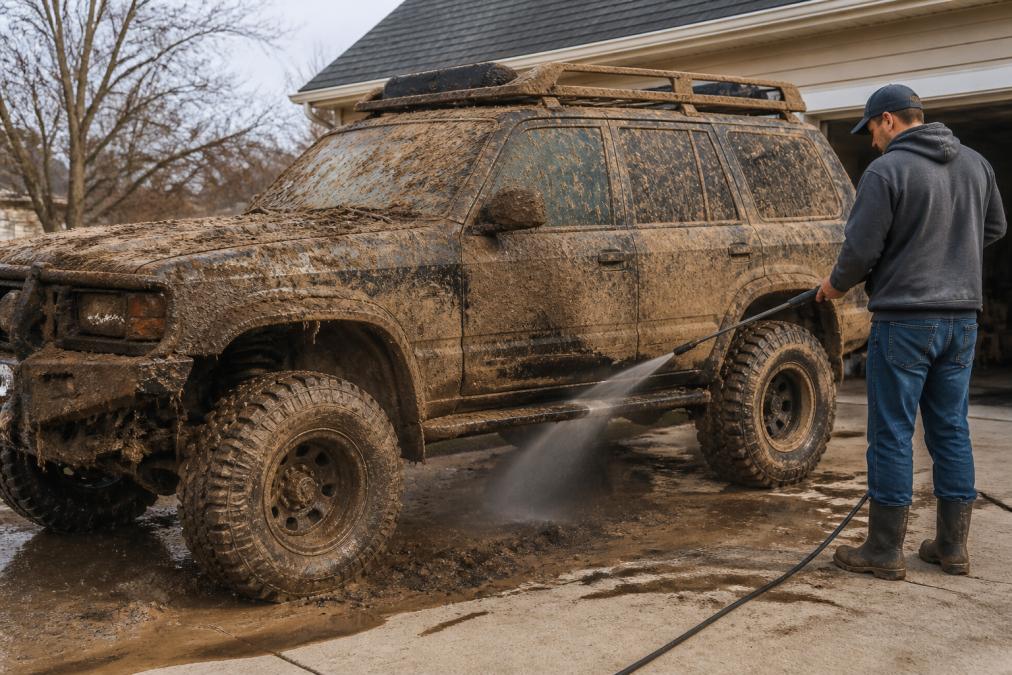
Start with a pressure washer set to 1500-2000 PSI, high enough to remove caked mud but not so high that it damages seals or forces water into electrical components. Begin with the undercarriage and drivetrain, paying special attention to the suspension, axles, and differential. Work your way up to the body panels, wheel wells, and engine bay.
Undercarriage and Drivetrain Cleaning
The undercarriage takes the worst punishment on the trail. Use the pressure washer to blast away dried mud, working systematically from front to rear. Focus on the differential, transfer case, and transmission pan, which collect mud that traps heat and accelerates fluid degradation. Clean suspension components thoroughly: shock bodies, control arms, bushings, and tie rods.
After pressure washing, dry the undercarriage with compressed air if available. This removes standing water that causes rust. Pay special attention to crevices where water collects.
Protecting Against Corrosion
After cleaning, apply corrosion protection to vulnerable areas. Undercoating products create a barrier between metal and moisture. Apply to the undercarriage, inside wheel wells, and around suspension components. Products like Fluid Film displace water and prevent rust formation.
Spray degreaser on heavily soiled engine bay areas, rinse gently, and dry thoroughly. Apply a light coat of protective spray to exposed metal surfaces. Wash the exterior with soap and water, dry completely, and apply a quality wax or sealant. Check that all drain holes are clear; water trapped in door panels or frame rails causes hidden rust.
Off-Road Suspension Maintenance Schedule and Best Practices
Your suspension system deserves a dedicated maintenance schedule. Suspension maintenance depends on trail intensity and environmental conditions. Light weekend trips require less frequent attention than weekly overlanding expeditions or vehicles used in coastal environments where salt accelerates corrosion.
Bushings, Shocks, and Struts Inspection
Inspect suspension bushings every 6 months or after 10 trail outings. Cracks, splits, or permanent deformation mean replacement is needed. A single failing bushing throws suspension geometry off and creates unpredictable handling.
Inspect shocks and struts visually for oil seepage, dents, or bent rods. Test shocks by pressing down on each corner of the vehicle and releasing. The vehicle should bounce once and settle; multiple bounces indicate worn shocks. Replace shocks and struts in pairs to maintain balanced handling.
Lubrication and Wear Monitoring
Grease all suspension joints every 12 months or after 20 trail outings. Use a grease gun to inject fresh grease into zerks (grease fittings) until grease begins to escape around the component.
Monitor tire wear patterns; uneven wear indicates suspension or alignment issues. Inner edge wear suggests toe-in is too aggressive; outer edge wear indicates toe-out. Address alignment issues promptly; they accelerate suspension wear and degrade handling.
Listen for clunking or creaking sounds during slow-speed maneuvers. These indicate worn bushings or loose connections. Tighten all visible bolts and investigate clunking sources before the next trail run.
Essential Off-Road Repair Tools and Maintenance Kit
Every overlander needs a basic repair kit for roadside fixes. Your kit should fit in a compact toolbox and include items for fluid top-offs, tire repairs, and basic adjustments.
Essential items include:
- Socket set (metric and standard, 1/4" and 3/8" drives)
- Wrench set (metric and standard)
- Screwdriver set (Phillips and flathead)
- Pliers (slip-joint and locking)
- Adjustable wrench and crescent wrench
- Tire plug kit and portable air compressor
- Jack and jack stands rated for your vehicle weight
- Jumper cables or portable jump starter
- Flashlight with extra batteries
- Spare fuses and relays for your specific vehicle
- Oil, coolant, and brake fluid (appropriate types for your rig)
- Duct tape and electrical tape
- Work gloves and safety glasses
- Owner's manual for your vehicle
Store tools in a weatherproof container that's easily accessible but secured so items don't rattle loose.
Personal Gear Care: Helmets, Boots, and Recovery Equipment
Off-road adventures require protective personal gear that takes as much punishment as your vehicle. Helmets, boots, gloves, and recovery equipment accumulate mud, moisture, and salt residue that degrades materials and reduces effectiveness. Proper care extends gear life and ensures equipment performs when you need it.
Cleaning and Drying Techniques
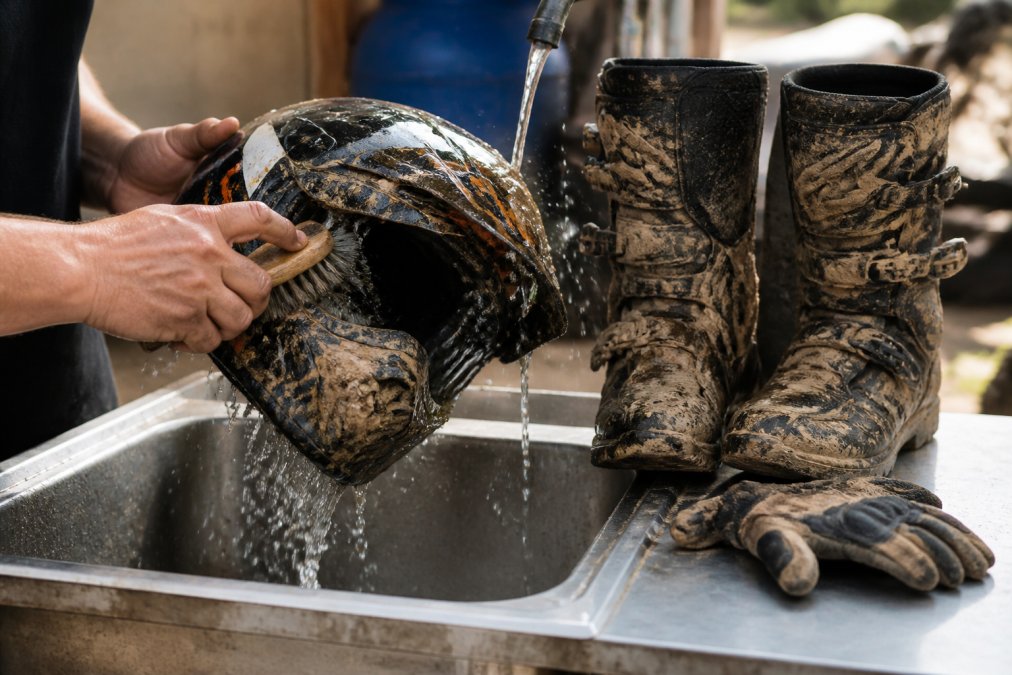
Clean helmet exterior with mild soap and water, using a soft brush to remove embedded dirt. Avoid high-pressure water that can force moisture into ventilation slots. Dry the exterior with a microfiber cloth. For the interior, wipe the padding with a damp cloth and air dry completely before wearing again.
Clean boots with a stiff brush to remove caked mud while they're still slightly damp. Rinse with low-pressure water and stuff with newspaper to absorb moisture. Change newspaper every few hours as it becomes saturated. Never use direct heat; excessive heat cracks leather and degrades glue bonds.
Hand wash gloves and other fabric gear with mild detergent and rinse thoroughly. Squeeze out excess water gently, don't wring. Air dry flat or hanging, away from direct sunlight and heat sources.
Recovery equipment like tow straps and shackles need special attention. Rinse with fresh water to remove salt and mud, dry thoroughly, and store in a dry location. Inspect straps for tears or fraying before each use. Check that shackles move freely and aren't corroded.
Inspecting for Structural Damage
After each trip, inspect gear for damage that might compromise safety or function. Check helmet exterior for cracks, dents, or impact damage. A helmet that's been struck should be replaced even if visible damage is minor. Inspect the chin strap for tears and ensure the retention system functions properly.
Examine boots for sole separation, cracked leather, or broken laces. Check for cracks in the heel or toe that might allow water to penetrate. Inspect gloves for torn seams, missing padding, or punctures. Look at all recovery gear for fraying, weak points, or corrosion.
Long-Term Storage Protocols for Off-Season Gear
Off-season storage requires preparation to prevent damage during months of inactivity. Improper storage leads to corrosion, rubber degradation, fluid separation, and moisture damage.
Before storing your vehicle and gear, perform a thorough cleaning and inspection. Fix any outstanding maintenance issues. Top off all fluid levels; full reservoirs minimize air space where moisture can condense. Change the oil and filter so acidic old oil doesn't sit in the engine.
Store in a dry location, ideally with climate control. If climate control isn't available, use desiccant products that absorb moisture. Disconnect the battery or connect a trickle charger to maintain charge without overcharging.
For personal gear, clean everything thoroughly before storage. Store in breathable containers rather than sealed plastic bags. Use cedar blocks or other natural moth deterrents if storing fabric gear. Check on stored equipment monthly for signs of moisture, corrosion, or pest damage.
Repair vs. Replace: When to Fix or Upgrade Your Gear
Deciding whether to repair or replace worn gear requires honest assessment of condition, cost, and safety implications. Some components are critical for safety; others are purely functional. A cracked helmet must be replaced; repair isn't safe. A torn seat cover can be repaired.
| Component | Repair Threshold | Replace Threshold | Cost-Benefit Tipping Point |
|---|---|---|---|
| Helmet | No visible damage | Any impact or crack | Always replace if compromised |
| Suspension (shocks/struts) | Minor seepage | Active dripping or leaks | Replace when oil loss accelerates |
| Tires | 6/32" tread remaining | Below 4/32" or sidewall damage | Replace before tread reaches 4/32" |
| Bushings | Minor cracks | Splits or permanent deformation | Replace when play becomes noticeable |
| Tow straps | Minor fraying | Tears or significant wear | Replace when structural integrity questioned |
| Boots | Minor sole wear | Sole separation or major cracks | Resole if upper is sound; replace if upper damaged |
| Gloves | Worn padding | Torn seams or punctures | Replace when padding degraded |
When repair costs approach 60-70% of replacement cost, replacement usually makes economic sense. New components often offer improved performance or durability compared to older designs.
For vehicle components, safety always overrides cost considerations. Worn suspension, failing brakes, or damaged steering components must be replaced immediately.
Precision Upgrades offers replacement components engineered for trail performance. When it's time to upgrade worn gear, our curated selection of premium overlanding equipment and high-performance components ensures your rig is trail-ready. Whether you're replacing suspension components, adding protective gear, or upgrading recovery equipment, our fast shipping and reliable quality get you equipped for your next adventure.
Maintaining off-road gear isn't complicated, but it's non-negotiable if you want reliable equipment on the trail. A structured maintenance routine catches problems early, extends component life, and keeps you safe during extended backcountry trips. Start with a pre-trip inspection checklist, establish a cleaning schedule, and address wear before it becomes failure. When it's time to replace worn components or upgrade your setup, Precision Upgrades provides premium overlanding gear and trail-tested equipment engineered to withstand the rigors of off-road adventure. Shop our collection of suspension components, protective gear, and recovery equipment to keep your rig trail-ready year-round.
Frequently Asked Questions
What are the most important items to check before an off-road trip?
Start with your pre-trip inspection checklist: tire pressure and tread depth, fluid levels (oil, coolant, brake fluid), suspension components for wear, and drivetrain condition. Check all lights, recovery gear attachment points, and structural integrity of your rig. These checks prevent mechanical failure on the trail and ensure your vehicle stays trail-ready. Most overlanding accidents stem from neglected pre-trip maintenance.
How often should I service off-road suspension components?
Inspect suspension after every trail trip for visible damage, worn bushings, or loose tie rods. Lubricate moving parts every 500 miles of off-road use or monthly if you're an active overlander. Full suspension maintenance, including shocks and struts, should happen annually or every 50 hours of trail time. Preventative maintenance here prevents expensive repairs and extends gear longevity significantly.
What's the best way to prevent rust on my 4x4's undercarriage?
Clean your undercarriage within 24 hours of muddy trail rides to remove corrosive debris. Use eco-friendly cleaning agents when possible and allow complete moisture removal before storage. Apply a protective coating to exposed metal areas annually. Proper drying after cleaning is critical, moisture trapped in tight spaces accelerates corrosion. Store your rig in a dry location during off-season to minimize rust development.
How do I know if my off-road gear needs repair or replacement?
Inspect gear for structural damage: cracks in helmets, torn straps on recovery equipment, or compromised buckles and zippers. Minor wear on gear like boots or visors can often be repaired. However, if safety-critical components like helmets show impact damage or suspension bushings are severely worn, replacement is necessary. When in doubt, replace, failed gear on the trail creates dangerous situations you can't fix in the backcountry.
This article was written using GrandRanker