
Table of Contents
- Why Moisture Damage Threatens Your Off-Road LED Lights
- Understanding IP Ratings for Off-Road LED Lights
- Waterproofing Off-Road Light Bars: Core Sealing Methods
- DIY Sealant Application Guide for LED Light Housings
- Breathable Vents for LED Lights: Balancing Airflow and Protection
- Silica Gel for LED Lights: Desiccant Integration Methods
- Preventative Maintenance to Prevent Moisture in Off-Road Lighting
- Troubleshooting Water Ingress vs. Condensation
Last Updated: July 26, 2026
Why Moisture Damage Threatens Your Off-Road LED Lights
Preventing moisture in off-road LED lights is critical to ensuring your investment lasts through challenging terrain. At Precision Upgrades, we've seen countless LED light bars fail prematurely because moisture crept into housings that looked sealed but weren't. Moisture damage progresses from tiny water droplets inside the lens to corrosion on electrical contacts to complete light failure when you need it most on the trail.
Moisture enters through two mechanisms: direct water ingress when seals fail, and condensation from temperature swings. When LED lights heat to 150°F during operation and cool to 40°F at night, the internal pressure differential can exceed several pounds per square inch, pulling moisture-laden air through microscopic gaps in seals.
Understanding IP Ratings for Off-Road LED Lights
IP ratings tell you exactly how well a light housing resists water and dust. The first digit indicates dust protection (0-6), the second indicates water protection (0-9). An IP67-rated light is completely dust-proof and can handle temporary immersion in water up to 1 meter deep. An IP68-rated light is designed for continuous immersion and extended water pressure.
IP67 lights suit most overlanding and off-road use, including river crossings and heavy rain. IP68 lights are the premium choice for extreme water crossings. Critically, an IP67 or IP68 rating only applies when the light is sealed correctly and all components are properly installed. A single cracked lens, loose mounting bracket, or breathing valve installed upside down will compromise that rating instantly.
Waterproofing Off-Road Light Bars: Core Sealing Methods
The most effective way to prevent moisture in off-road LED lights is to understand and maintain three primary sealing systems: O-ring seals, gaskets, and sealant compounds.
O-ring seals and gasket replacement are your first line of defense. O-rings are rubber or silicone rings that sit in grooves around connection points, typically where the lens meets the housing or where wiring harnesses pass through. Over time, these rings compress, harden, and lose their ability to create a watertight seal. Replacing O-rings is straightforward: remove the old ring, clean the groove thoroughly with a lint-free cloth, apply a thin layer of silicone grease to the new ring, and install it. Always get the exact O-ring size and material specification. Silicone O-rings work better than rubber in temperature extremes because they maintain flexibility across a wider temperature range.
RTV silicone sealant application is where many DIY repairs go wrong. RTV stands for "Room Temperature Vulcanizing," meaning it cures at room temperature without requiring an oven. For LED light housings, use 100% silicone RTV sealant rated for marine or automotive use. Avoid acrylic or polyurethane sealants, which don't maintain flexibility and crack when housings expand and contract.
Apply a continuous, uniform bead approximately 1/8 inch in diameter around the entire sealing surface using a caulking gun with steady pressure. Smooth the bead gently with a wet finger or caulking tool to ensure it fills gaps without creating air pockets.
DIY Sealant Application Guide for LED Light Housings
This section walks you through the complete process of applying RTV silicone sealant to prevent moisture in off-road LED lights.
Step 1: Clean and inspect the housing
Before applying any sealant, the surface must be absolutely clean and dry. Remove the light from your vehicle if possible. Use a small brush or compressed air to remove dust and debris from the sealing surface. Wipe the area with a lint-free cloth dampened with rubbing alcohol, paying special attention to grooves and corners where old sealant residue remains.
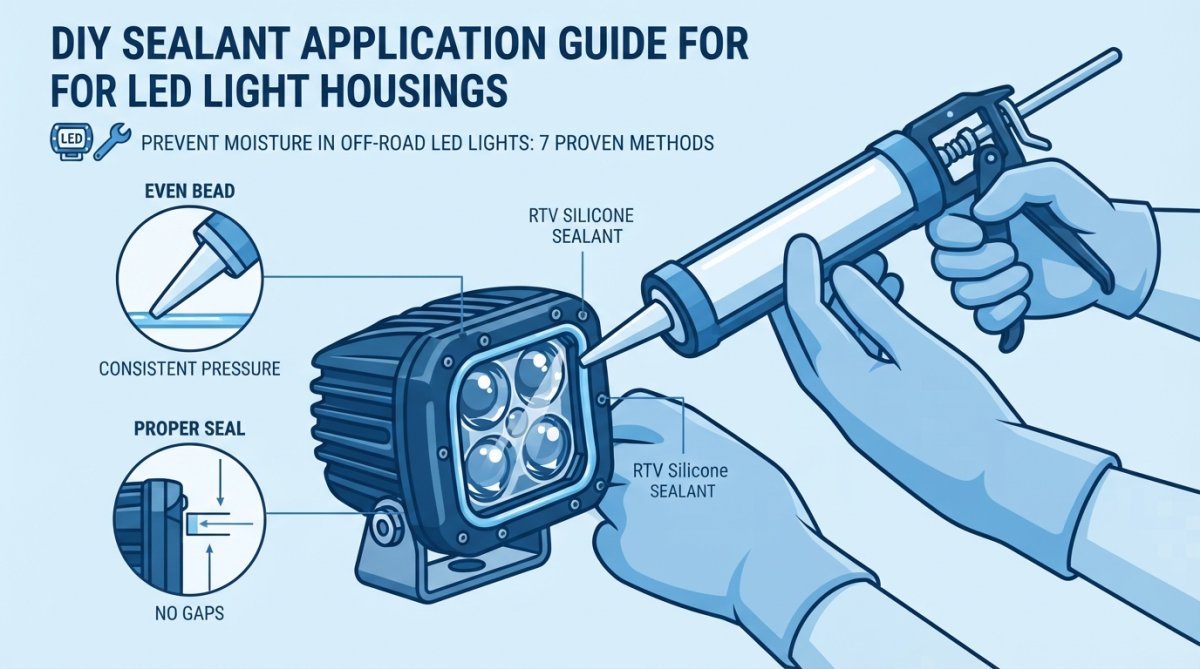
If there's old sealant, remove it completely using a plastic scraper. For stubborn residue, apply a silicone sealant remover product and let it sit for 15-30 minutes before scraping. After removing old sealant, wipe the area again with rubbing alcohol and allow it to dry completely. Inspect the O-rings and gaskets while you have the housing open. If they look compressed, cracked, or hardened, replace them now.
Step 2: Apply RTV silicone correctly
Cut the caulking gun nozzle at a 45-degree angle, making an opening approximately 1/8 inch in diameter. Test the gun on cardboard first to get a feel for the pressure needed.
Apply the sealant in a continuous bead around the entire sealing surface, moving slowly and maintaining even pressure. The bead should be uniform in diameter and fill gaps without excessive overflow. Smooth it gently using a wet finger, caulking tool, or the back of a plastic spoon. Work quickly, RTV begins to skin over within 10-15 minutes.
Step 3: Cure time and pressure testing
RTV silicone reaches handling strength in 24 hours but requires 7 days for full cure. Don't reinstall the light or expose it to water pressure until fully cured. Once cured, perform a pressure test before reinstalling. Submerge the sealed light housing in water for 5-10 minutes and inspect the interior for any moisture. If water entered, identify where and apply additional sealant.
Breathable Vents for LED Lights: Balancing Airflow and Protection
Breathing valves solve the condensation problem by allowing pressure equalization while blocking liquid water. As the light heats and cools, internal pressure changes. Without a breathing valve, negative pressure would form and pull moisture-laden air inward. With a breathing valve, pressure equalizes gradually, preventing the pressure differential that draws in moist air.
The most common breathing valve design uses a hydrophobic (water-repelling) membrane made from PTFE or similar materials that naturally repel water while remaining permeable to air. The vent should be located at the highest point of the housing so any condensation that forms can drain downward rather than accumulating.
Inspect breathing vents every few months, especially after dusty trail conditions. If the vent looks dirty or clogged, replace it rather than trying to clean it; replacement vents cost $5-15 and take 30 seconds to install.
Silica Gel for LED Lights: Desiccant Integration Methods
Silica gel desiccant packs are small packets filled with silica beads that absorb moisture from the air inside your light housing. They're not a replacement for proper sealing, but they work as an insurance policy against the condensation that inevitably forms in sealed environments.
Look for packs specifically designed for automotive or marine use, typically larger and containing more silica material. A standard 5-gram pack absorbs moisture from a 1-liter space; a larger 10-20 gram pack handles a full-size light housing. Installation is simple: place the desiccant pack inside the housing before sealing it, positioned where it won't interfere with electrical connections or light output.
The silica gel will gradually turn from white to pink as it absorbs moisture. In dry climates, a pack might remain effective for a full year. In humid environments or with frequent water-crossing, replace packs every 3-6 months.
Preventative Maintenance to Prevent Moisture in Off-Road Lighting
Regular inspection and cleaning routines are your best defense against moisture damage. Set a maintenance schedule based on usage frequency. If you use your vehicle weekly for off-road adventures, inspect your lights monthly. If you're an occasional weekend user, quarterly inspections are sufficient.
During each inspection, look for condensation on the inside of the lens, discoloration or corrosion on the housing, and any cracks or gaps in seals. Condensation that appears and disappears with temperature changes is normal. Condensation that remains even after the light has warmed up indicates a seal failure needing attention.
Clean the exterior of your lights after each trail use, especially in water or muddy conditions. Use a soft brush and mild soap to remove dirt and debris, paying special attention to seams and vents where water might collect.
| Maintenance Task | Frequency | What to Check | Action if Problem Found |
|---|---|---|---|
| Visual inspection | Monthly (weekly use) or quarterly (occasional use) | Condensation, corrosion, cracks in seals | Clean interior if accessible; replace seals if damaged |
| Exterior cleaning | After each trail use | Dirt, mud, standing water on housing | Wash with mild soap; dry thoroughly |
| Vent inspection | Every 3 months | Clogging, dust accumulation | Replace vent if dirty or clogged |
| Desiccant pack check | Every 3-6 months | Color change from white to pink | Replace when mostly pink |
| Seal examination | Annually | O-ring compression, gasket degradation | Replace O-rings or gaskets as needed |
Troubleshooting Water Ingress vs. Condensation
Identifying the source of moisture is the first step toward fixing the problem. Water ingress means liquid water has entered the housing through a gap or crack. Condensation means water vapor inside the housing has turned to liquid on cool surfaces.
If water appears only when actively using the light or immediately after water exposure, you likely have water ingress. If water appears during cool nights or early mornings without water exposure, you likely have condensation.
For water ingress, identify the leak source and apply additional sealant. Shine a light inside the housing and look for the entry point. Common entry points are around the lens bezel, along the mounting bracket, or where the wiring harness passes through. Once identified, clean the area thoroughly and apply RTV silicone sealant.
For condensation, the quick fix is installing or replacing a desiccant pack. If the light already has a breathing vent, inspect it to ensure it's not clogged. If there's no breathing vent, adding one is the next step.
When to replace components entirely depends on the extent of damage. If you see corrosion on circuit boards or discoloration on the lens that won't clean off, the light has been compromised beyond simple sealing repairs. However, if the housing itself is sound and only the seals have failed, replacement seals and sealant application will restore the light to like-new condition.
Moisture damage to your off-road LED lights is preventable through proper sealing, ventilation, and maintenance. The combination of O-ring seals, RTV sealant, breathing vents, and desiccant packs creates a complete defense system. Precision Upgrades offers premium LED light bars engineered with marine-grade sealing, integrated breathing vents, and O-ring specifications designed for extreme temperature swings. Our lights come with detailed maintenance guides and replacement seal kits so you can keep them functioning for years of trail use. Shop our collection and get equipped with lighting you can trust in any conditions.
Frequently Asked Questions
Why do my off-road LED lights get condensation inside?
Condensation forms when warm air inside the light housing cools rapidly, causing moisture to condense on internal surfaces. This happens due to thermal expansion, as temperature fluctuates between day and night or during water crossings, air pressure changes inside the sealed housing. Humidity from the environment and residual moisture during manufacturing can also contribute. Without proper breathing valves or ventilation, pressure imbalances force moisture deeper into the housing, leading to lens fogging and potential corrosion.
What's the difference between IP67 and IP68 ratings for off-road lights?
IP67 lights are dustproof and can withstand immersion in water up to 1 meter for 30 minutes, making them suitable for most off-road conditions. IP68 lights offer the same dust protection but can handle immersion beyond 1 meter (depth and duration depend on manufacturer specs), providing better protection during deep water crossings. For serious overlanding, IP68 is the safer choice, though IP67 is adequate for typical weekend trails. Always verify the manufacturer's specific depth and time ratings, as they vary.
Can I use silicone sealant to fix moisture in my LED light bar?
Yes, RTV silicone sealant can help seal gaps and cracks causing water ingress, but it won't remove existing moisture. Before applying sealant, you must open the housing, dry it completely, and inspect O-ring seals and gaskets for damage. Clean all surfaces thoroughly, apply sealant to seams and around mounting hardware, and allow full cure time (typically 24 hours) before use. For condensation already inside, use desiccant packs or a combination of sealant and breathing valves to prevent future buildup. DIY sealant is preventative, not a cure for existing water damage.
How often should I replace silica gel desiccant packs in my LED lights?
Silica gel effectiveness depends on environmental exposure and humidity levels. In high-humidity or frequently wet conditions, replace desiccant packs every 3-6 months. In drier climates or seasonal use, annual replacement may suffice. Monitor the gel's color indicator (if included); when it changes from blue to pink or appears saturated, replacement is due. Some overlanders check packs during seasonal maintenance or after major water crossings. Precision Upgrades recommends pairing desiccants with proper sealing and breathing valves for optimal protection, no single method works alone.
This article was written using GrandRanker