
Table of Contents
- Common Causes of LED Flickering on Offroad Vehicles
- How to Test Voltage Drop on Vehicle Lights
- Signs of a Bad Ground Connection
- Identifying Faulty LED Drivers and Power Supply Issues
- Best Relay Harness for LED Light Bars
- Checking Wiring, Connectors, and Corrosion
- Incompatible Dimmer Switches and PWM Interference
- Conclusion
Last Updated: August 24, 2026
Common Causes of LED Flickering on Offroad Vehicles
Flickering LED offroad lights can ruin your trail experience and signal deeper electrical problems with your vehicle. The most common culprits fall into a predictable pattern: power supply instability, ground connection failures, incompatible dimmer switches, and faulty LED drivers.
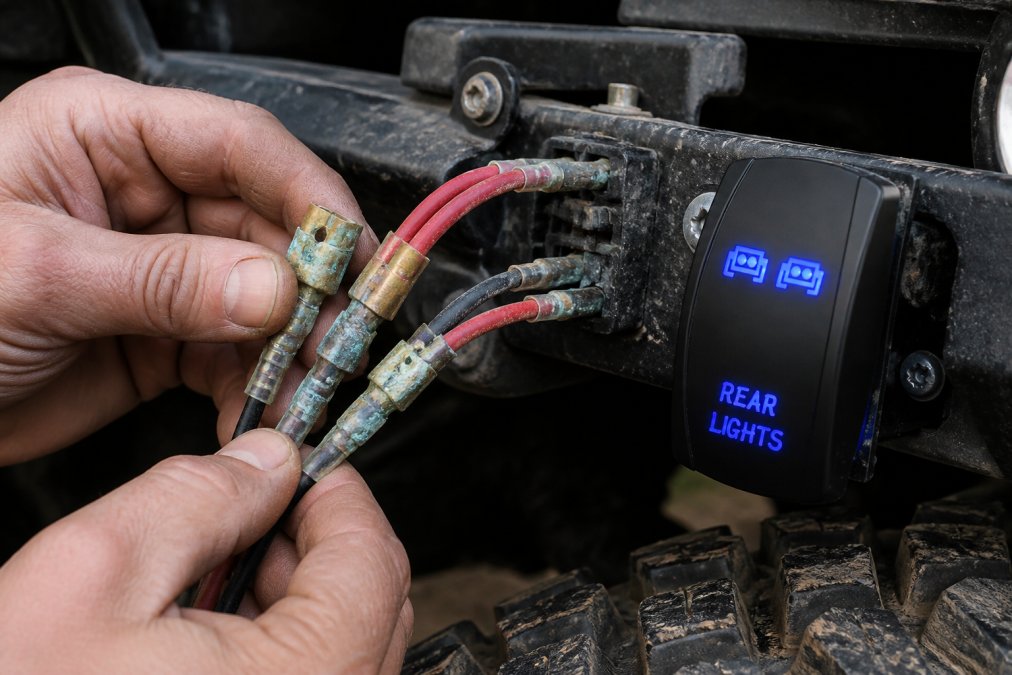
Understanding what's actually happening inside your electrical system is the first step toward a permanent fix. When your LED lights flicker, your vehicle's electrical system is struggling to deliver consistent voltage to the light bar. This isn't just annoying, it's a sign that something in your circuit is working too hard or failing entirely.
The thing nobody tells you about LED flickering is that it often stems from multiple small problems compounding each other, not one catastrophic failure. A slightly undersized wire combined with a marginal ground connection and an incompatible dimmer switch creates the perfect storm for hyper-flashing and intermittent illumination.
How to Test Voltage Drop on Vehicle Lights
The most reliable way to diagnose electrical problems in your LED offroad lights is measuring voltage drop across your circuit using a multimeter. Voltage drop occurs when electrical resistance in wiring, connectors, or components causes a loss of electrical pressure between your battery and your lights. Even small drops accumulate and cause flickering.
What You'll Need
Before you start testing, gather these tools:
- Digital multimeter (any standard model works, you don't need anything expensive)
- Safety glasses and work gloves
- Vehicle service manual for your specific model
- Pen and paper to record your measurements
- Access to your vehicle's battery and light bar wiring
Step-by-Step Testing Process
Step 1: Set Your Multimeter to DC Voltage Mode [Time: 2 minutes]
Turn your multimeter dial to the DC voltage setting (usually marked with a "V" and a line with dots). This setting measures direct current voltage, which is what your vehicle's battery produces. Set the range to 20V if your multimeter has manual range selection, this gives you enough headroom to read your vehicle's 12V system accurately.
Step 2: Measure Voltage at Your Battery [Time: 3 minutes]
Connect the multimeter's red probe to your vehicle's positive battery terminal and the black probe to the negative terminal. Record this reading, this is your baseline voltage. A healthy battery should read between 12.5V and 13.5V when the engine is off, and 13.5V to 14.5V when running. If your reading is below 12V, your battery may be weak and could be contributing to flickering.
Step 3: Measure Voltage at the LED Light Bar [Time: 5 minutes]
With the lights on, connect the red probe to the positive input of your LED light bar and the black probe to its negative input. Record this measurement. Now subtract this reading from your battery voltage. Any drop larger than 0.5V indicates resistance in your wiring harness or connectors, this is your problem area.
Step 4: Test Ground Connection Voltage Drop [Time: 5 minutes]
Connect your multimeter's red probe to the negative terminal of your battery and the black probe to the chassis ground point where your LED light bar grounds. With the lights on, any reading above 0.1V indicates a bad ground connection. Ground problems cause more flickering than almost any other single issue because your return path for electrical current is compromised.
Expected Result: You should see minimal voltage drop (under 0.5V) between your battery and light bar when the system is healthy. Anything higher means you need to investigate wiring gauge, connector quality, or ground connections.
Signs of a Bad Ground Connection
A faulty ground connection is responsible for more LED flickering problems than any other single cause. Your ground connection is the return path for electrical current, if this path has resistance, your LED lights can't function properly. The symptoms of a bad ground are distinctive once you know what to look for.
Your LED lights flicker inconsistently, sometimes bright and sometimes dim, but they never fully shut off. This pattern is classic ground connection failure because the circuit is still completing, but the return path is fighting resistance. You might also notice that flickering gets worse when you're accelerating or when other electrical loads (like your engine fan) kick on.
Look for these physical signs: white or green corrosion buildup at your ground terminal, a loose or corroded bolt connecting your ground cable, or a ground cable that's undersized for your current draw. If your ground cable is thinner than 4 AWG (American Wire Gauge), it's probably too small for modern LED light bars that draw significant amperage.
The solution is straightforward but requires attention to detail. Disconnect your ground cable from the chassis, clean the connection point with a wire brush until bare metal is visible, and reconnect using a fresh bolt with a star washer to prevent future corrosion. If your ground cable shows corrosion or damage, replace it with a new cable of appropriate gauge.
Identifying Faulty LED Drivers and Power Supply Issues
Your LED driver is the component that converts your vehicle's 12V power into the precise electrical signal your LED chips need. A failing driver produces erratic voltage output, which manifests as flickering, dimming, or complete failure. Modern LED light bars contain drivers that manage power delivery and protect against voltage fluctuations.
When a driver fails, it typically shows one of three patterns: the lights flicker at a steady rate (often called hyper-flashing), they dim and brighten randomly, or they fail to turn on entirely. The flickering pattern matters because it tells you whether the problem is the driver itself or the power supply feeding it.
Test your LED driver by measuring the voltage output directly at the driver's output terminals (not at the LED chips themselves). A healthy driver should deliver steady voltage that matches your input voltage minus a small drop (usually 0.5V or less). If you see voltage fluctuations larger than 1V, your driver is failing and needs replacement.
Power supply problems are slightly different from driver failures. If your vehicle's alternator is struggling to keep up with your electrical loads, voltage sags when you accelerate or turn on additional accessories. This creates the appearance of a flickering problem when the real issue is insufficient charging capacity. Modern vehicles with multiple aftermarket accessories often face this problem.
The fix depends on your diagnosis. If your driver is faulty, you'll need to replace your entire light bar or just the driver module if it's replaceable. If your power supply is the issue, you may need to upgrade your alternator or reduce your electrical load. For most overlanders, a quality wiring harness with proper relay and fuse protection solves power supply problems.
Best Relay Harness for LED Light Bars
A relay harness is essential for any LED light bar installation because it protects your vehicle's factory wiring from the high amperage draw of modern LEDs. Without a relay harness, you're routing current through your factory switches and wiring, which weren't designed for this load. This causes voltage drop, heat buildup, and eventually, flickering or failure.
The Heretic Wiring Harness for 40-inch and larger light bars includes everything you need: an inline fuse for circuit protection, a relay to handle the high amperage, and a switch to control your lights. At $49.99, it's a complete solution that eliminates one entire category of flickering problems. The relay ensures that your factory wiring only carries the signal to activate the lights, not the full current draw.
When choosing a relay harness, match it to your light bar's power requirements. Most LED light bars in the 40-inch to 50-inch range draw between 180W and 300W. A properly sized relay harness handles this load without voltage drop. Undersized harnesses create the same problems you're trying to solve.
Installation is straightforward: connect the harness leads to your battery (positive and negative), plug the harness into your light bar, and mount the switch in your cabin. The inline fuse protects your entire circuit if something goes wrong. This setup prevents voltage drop before it reaches your lights.
Checking Wiring, Connectors, and Corrosion
Corroded terminals and loose connectors are silent killers of LED light bar reliability. Corrosion introduces resistance into your circuit, which causes voltage drop and flickering. The problem gets worse in humid climates or when vehicles spend time near salt water or salt-treated roads.
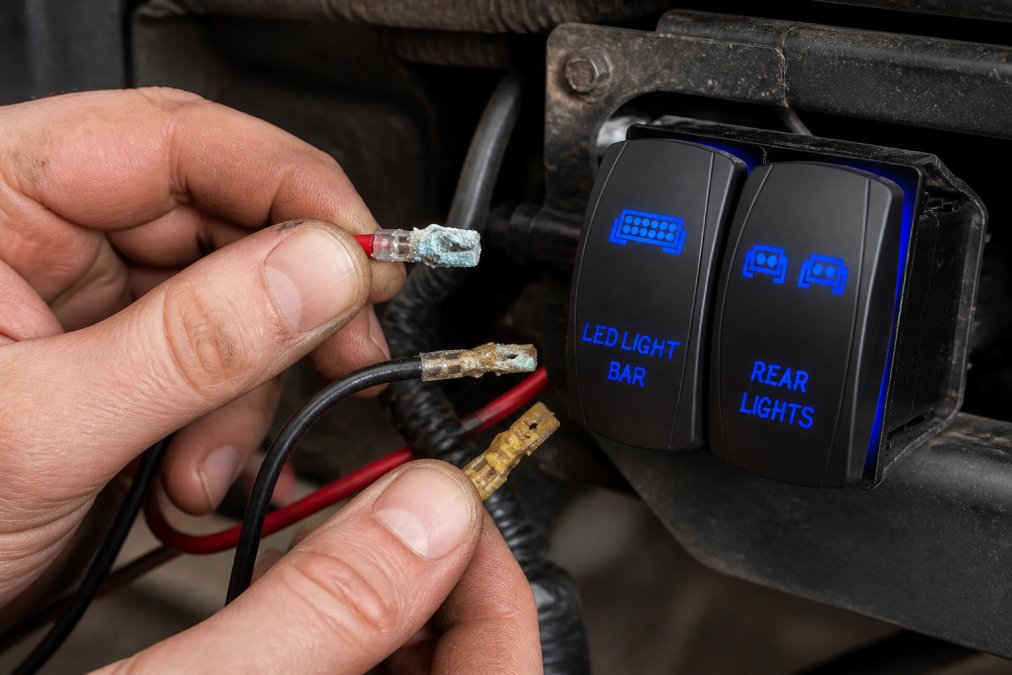
Start with a visual inspection of every connector in your LED light bar circuit. Look for white, green, or blue corrosion buildup on brass terminals. Check that every connector is fully seated, a partially connected terminal can cause intermittent flickering. Gently tug on each wire to ensure it's not loose inside the connector.
If you find corrosion, disconnect the affected connector and clean both the terminal and the wire end with a wire brush or fine sandpaper. Remove all visible corrosion until you see bare metal. Reconnect the terminal firmly and apply a thin layer of dielectric grease to prevent future corrosion.
Wiring gauge matters more than most people realize. If your LED light bar wiring is undersized for the current draw, you'll experience voltage drop even with perfect connections. A common mistake is using 10 AWG or 12 AWG wire for light bars that draw 20+ amps. Use 4 AWG or 6 AWG wire for most LED light bar installations. Thicker wire means lower resistance and more stable voltage delivery.
Check your wiring harness for damage, pinching, or exposure to heat sources. Damaged insulation allows corrosion to attack the copper inside. Route your wiring away from sharp edges, hot engine components, and moving parts. Secure your harness with clips every 12 inches to prevent vibration damage.
Incompatible Dimmer Switches and PWM Interference
Modern vehicles use PWM (pulse width modulation) technology to control lighting intensity. This technology rapidly switches power on and off at high frequency to create the appearance of dimmed light. LED light bars don't always play well with factory dimmer switches because the PWM signal can interfere with your LED driver's operation.
The result is flickering that gets worse when you adjust your dimmer switch. Some LED drivers can't handle the rapid switching of PWM signals, so they interpret the modulation as a power problem and respond with their own flickering. This creates a feedback loop that makes your lights appear to strobe.
The solution is using an aftermarket switch designed for LED lighting rather than trying to use your factory dimmer. The Nilight 5Pin SPST On/Off rocker switches ($28.95 for a pair) bypass PWM entirely by providing simple on/off control. These switches deliver full power to your LED light bar without any modulation, eliminating PWM interference completely.
If you must use a factory dimmer, test whether it's causing your flickering by turning the dimmer to full brightness and observing whether the flickering stops. If it does, your dimmer is incompatible with your LED driver. Some modern LED drivers include PWM filtering to handle factory dimmers, but cheaper drivers don't.
CANbus systems on newer vehicles can also interfere with LED operation. CANbus is a communication network that controls various vehicle systems. If your LED light bar wiring runs near CANbus lines, electromagnetic interference can cause flickering. Keep your LED wiring at least 6 inches away from CANbus cables and other data lines. Use shielded cable if you must route near sensitive electronics.
Troubleshooting flickering LED offroad lights comes down to systematic testing and attention to electrical fundamentals: voltage, ground, and circuit protection. Most flickering problems stem from voltage drop in wiring or ground connections, these are the first places to investigate. If you've ruled out those issues, look at your LED driver, dimmer switch compatibility, and power supply capacity.
At Precision Upgrades, we recommend starting with a quality relay harness and proper wiring gauge, then diagnosing any remaining issues with a multimeter. A relay harness like the Heretic Wiring Harness eliminates most installation-related problems and protects your vehicle's electrical system. Pair this with proper ground connections and corrosion prevention, and your LED lights will perform reliably on every trail. Your overlanding adventures deserve lighting you can trust, get your LED system dialed in before your next expedition.
=== FAQ ANSWERS (audit these too, same rules) ===
[1] Q: Can a bad ground cause LED light bars to flicker? A: Yes. A poor ground connection is one of the most common causes of flickering LED offroad lights. When the return path to chassis ground is compromised by corrosion, loose terminals, or undersized wiring, current struggles to complete the circuit. This causes voltage to drop unpredictably, making LEDs pulse or dim rapidly. Test your chassis ground with a multimeter by checking continuity between the light bar housing and the vehicle's negative battery terminal.
[2] Q: Do I need a relay harness to stop LED flickering? A: Not always, but a relay harness helps prevent flickering caused by voltage drop over long wire runs or factory switch limitations. The Heretic Wiring Harness for single light bars includes an inline fuse, relay, and switch designed to deliver stable power directly from the battery. If your flickering started after adding aftermarket LEDs without a proper harness, upgrading to one often solves the problem by bypassing weak factory circuits.
[3] Q: What causes LED offroad lights to flicker while driving? A: Flickering that happens specifically while driving often points to PWM (pulse width modulation) interference from the vehicle's CANbus system, alternator ripple, or incompatible dimmer switches. Motion can also expose loose connections that vibrate during trail use. Start by checking for loose wiring and connectors, then test input voltage stability with a multimeter. If voltage holds steady but flickering persists, PWM interference or a failing LED driver may be the culprit.
[4] Q: How do I know if my LED light bar is failing? A: A failing LED driver or chips typically show hyper-flashing, complete dropout on one side, or flickering that worsens over time. Use a multimeter to check input voltage at the driver when the light is on. If voltage reads normal but LEDs still flicker or won't illuminate, the driver is likely faulty. Visual inspection for moisture ingress, burn marks, or corrosion around the driver housing also indicates failure. Most quality LED bars have a warranty; contact the manufacturer if you suspect a defect.
Frequently Asked Questions
Can a bad ground cause LED light bars to flicker?
Yes. A poor ground connection is one of the most common causes of flickering LED offroad lights. When the return path to chassis ground is compromised by corrosion, loose terminals, or undersized wiring, current struggles to complete the circuit. This causes voltage to drop unpredictably, making LEDs pulse or dim rapidly. Test your chassis ground with a multimeter by checking continuity between the light bar housing and the vehicle's negative battery terminal.
Do I need a relay harness to stop LED flickering?
Not always, but a relay harness helps prevent flickering caused by voltage drop over long wire runs or factory switch limitations. The [Heretic Wiring Harness](https://precisionupgradesmd.com/products/heretic-wiring-harness-single-light-40-inches-and-larger) for single light bars includes an inline fuse, relay, and switch designed to deliver stable power directly from the battery. If your flickering started after adding aftermarket LEDs without a proper harness, upgrading to one often solves the problem by bypassing weak factory circuits.
What causes LED offroad lights to flicker while driving?
Flickering that happens specifically while driving often points to PWM (pulse width modulation) interference from the vehicle's CANbus system, alternator ripple, or incompatible dimmer switches. Motion can also expose loose connections that vibrate during trail use. Start by checking for loose wiring and connectors, then test input voltage stability with a multimeter. If voltage holds steady but flickering persists, PWM interference or a failing LED driver may be the culprit.
How do I know if my LED light bar is failing?
A failing LED driver or chips typically show hyper-flashing, complete dropout on one side, or flickering that worsens over time. Use a multimeter to check input voltage at the driver when the light is on. If voltage reads normal but LEDs still flicker or won't illuminate, the driver is likely faulty. Visual inspection for moisture ingress, burn marks, or corrosion around the driver housing also indicates failure. Most quality LED bars have a warranty; contact the manufacturer if you suspect a defect.
This article was written using GrandRanker