
Table of Contents
- Assess Your Vehicle's Current Suspension
- How to Calculate Payload for Overlanding
- Choose the Right Suspension Components
- Tools Needed for Suspension Upgrade
- Step-by-Step Installation Process
- Suspension Maintenance for Off-Road Vehicles
- Tuning Your Suspension for Specific Terrain
- Conclusion
Last Updated: August 22, 2026
Assess Your Vehicle's Current Suspension
Before upgrading your SUV overlanding suspension, understand what you're starting with. Factory suspension was engineered for street driving, not backcountry punishment. Check your vehicle's door jamb or owner's manual for GVWR (Gross Vehicle Weight Rating) and payload capacity. Subtract curb weight from GVWR to find your actual payload. Many overlanders load beyond this spec, destroying suspension geometry and accelerating component wear.
Visually inspect your current suspension for sagging, fluid leaks around shocks, and worn bushings. Push down on each corner and count bounces, more than two indicates worn dampening. Document the condition with photos to decide whether you need a full rebuild or targeted upgrades.
How to Calculate Payload for Overlanding
Payload capacity is the single most important number in suspension planning. Exceed it and your springs can't support the weight, shocks can't dampen properly, and you risk failure on uneven terrain.
Start with your vehicle's rated payload capacity. Subtract permanent modifications: roof rack, bumpers, winch, auxiliary fuel tank. What remains is available payload for gear, water, food, and passengers. A Toyota 4Runner with 1,500 pounds capacity minus 650 pounds of modifications leaves 850 pounds for everything else. A full water supply (50 gallons) weighs 400 pounds alone. You hit your limit faster than expected.
Overloading changes suspension geometry. Springs compress beyond design point, ride height drops, ground clearance shrinks, and control arm angles shift, throwing off wheel alignment. The fix is either reduce weight or upgrade your suspension. For extended overlanding, upgrading lets you carry what you actually need.
Choose the Right Suspension Components
Upgrading means selecting from three main spring types, each with different trade-offs.
Coil Springs vs. Leaf Springs vs. Airbags
Coil springs are the most common factory setup. They offer good on-road ride quality and moderate off-road performance, but sag under heavy load and don't adjust. Aftermarket coil springs with higher spring rates solve this but make the ride harsher on pavement.
Leaf springs are durable and handle heavy loads without sagging as much as coils, but deliver a rougher ride on-road and less articulation off-road because leaves bind under compression, limiting wheel travel.
Airbags use pressurized air chambers to maintain ride height regardless of load, keeping your vehicle level and consistent. The downside is complexity, more parts mean more potential failures in remote areas. For serious overlanders doing extended backcountry trips, this complexity can be a liability.
For most overlanders, upgraded coil springs with quality shocks offer the best balance. They're simpler than airbags, handle heavy loads better than factory coils, and deliver good articulation for off-road driving.
Spring Rate and Dampening Explained
Spring rate is the force required to compress a spring one inch, measured in pounds per inch (lbs/in) (sae.org). Higher spring rates support heavier loads without sagging but transmit more road harshness. Lower spring rates feel smoother but sag under load. For overlanding, you need a rate stiff enough to handle your loaded weight without bottoming out.
Dampening is what shocks do, they control how fast a spring compresses and rebounds. Monotube shocks (a single pressurized chamber) offer better dampening performance than twin-tube designs because they maintain consistent pressure throughout compression and rebound (peer-reviewed research). For off-road use, monotube shocks are standard.
Match your spring rate to your loaded weight and pair it with shocks that handle the frequency of impacts you'll encounter. A stiff spring with weak shocks will bounce and wallow. A soft spring with good shocks will sag and bottom out.
Tools Needed for Suspension Upgrade
A floor jack rated for at least 150% of your vehicle's weight is essential, never work under a vehicle supported only by a jack (osha.gov). Pair it with jack stands rated for the same weight.
You'll need socket sets (metric and standard), a torque wrench (critical for suspension bolts), and an impact wrench. Coil spring compressors are necessary if replacing coil springs, they prevent the spring from launching violently. A ball joint separator removes tie rods and control arm connections. An alignment tool helps verify suspension geometry after installation.
Invest in quality tools. Cheap sockets strip bolts, and a broken tool halfway through is a crisis.
Step-by-Step Installation Process
This assumes you're replacing coil springs and shocks, the most common overlanding upgrade. The process takes 4-6 hours per side if experienced.
Step 1: Lift and Secure the Vehicle
Loosen lug nuts before lifting. Use the floor jack to lift one corner at a time. Place jack stands under frame rails, not suspension components. Lower the vehicle onto stands. Install wheel chocks behind rear wheels. Remove the wheel.
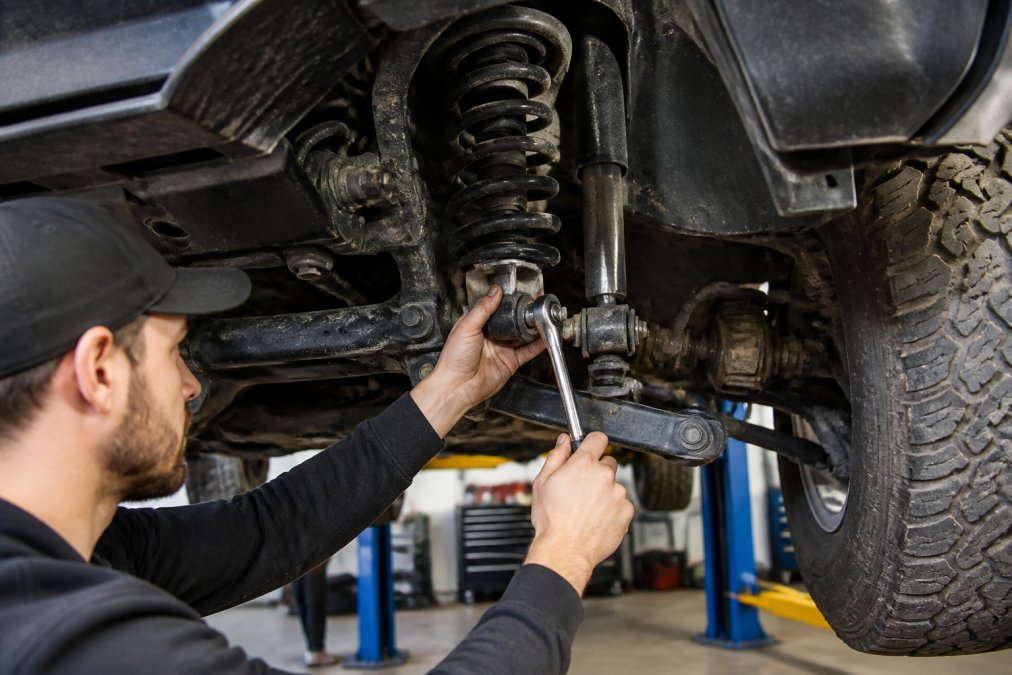
Step 2: Disconnect the Shock Absorber
Remove bolts at the top (frame) and bottom (control arm). Hold the shock shaft with a wrench while turning the bolt so it doesn't spin.
Step 3: Compress and Remove the Coil Spring
Install the coil spring compressor and tighten gradually. Once compressed, remove the bolt holding the spring to the control arm. Carefully release compressor tension and remove the spring.
Step 4: Install the New Spring and Shock
Position the new coil spring on the control arm. Reinstall the bolt and tighten to spec. Install the new shock, bolting it to frame and control arm. Tighten both bolts to spec.
Step 5: Repeat on the Other Side
Do the same process on the passenger side, then move to the rear and repeat on both rear corners.
Step 6: Lower the Vehicle and Settle the Suspension
Lower the vehicle onto all four wheels. Let it sit for 10 minutes so the suspension settles under its own weight.
Safety Protocols for DIY Installation
Work on level ground. Never work alone on suspension work. Wear safety glasses, coil springs under compression can fail, sending metal fragments flying. Check bolt torque specs for your specific vehicle using a torque wrench. Don't drive hard immediately after installation; drive normally for the first 100 miles.
Post-Installation Alignment and Calibration
After installation, your wheel alignment has changed. Get a professional alignment if possible, telling the technician you've upgraded the suspension. If unavailable, at least check toe using a tape measure. Measure the distance between the front and rear of the tires at the same height; the rear should be slightly smaller.
Measure ride height from ground to a fixed frame point on both sides. Measurements should be equal. If one side is higher, you have a spring or shock issue.
Suspension Maintenance for Off-Road Vehicles
Check shock fluid levels every 6 months or before major trips. Look for fluid leaking from the shock body. A small amount of oil on the rod is normal; fluid running down means the seal is failing.
Inspect bushings for cracks or deterioration. Cracked bushings create play in the suspension, making handling sloppy and increasing tire wear. Check all suspension bolts quarterly using a torque wrench. Monitor tire wear patterns, even wear suggests proper alignment, while edge wear suggests alignment is off. Scalloping suggests worn shocks or bushings.
After driving in water, wash the undercarriage and let the suspension dry. Water trapped in suspension joints causes corrosion and accelerates bushing failure.
Tuning Your Suspension for Specific Terrain
Your suspension setup isn't one-size-all. Rocky terrain, sand, mud, and snow each demand different tuning.
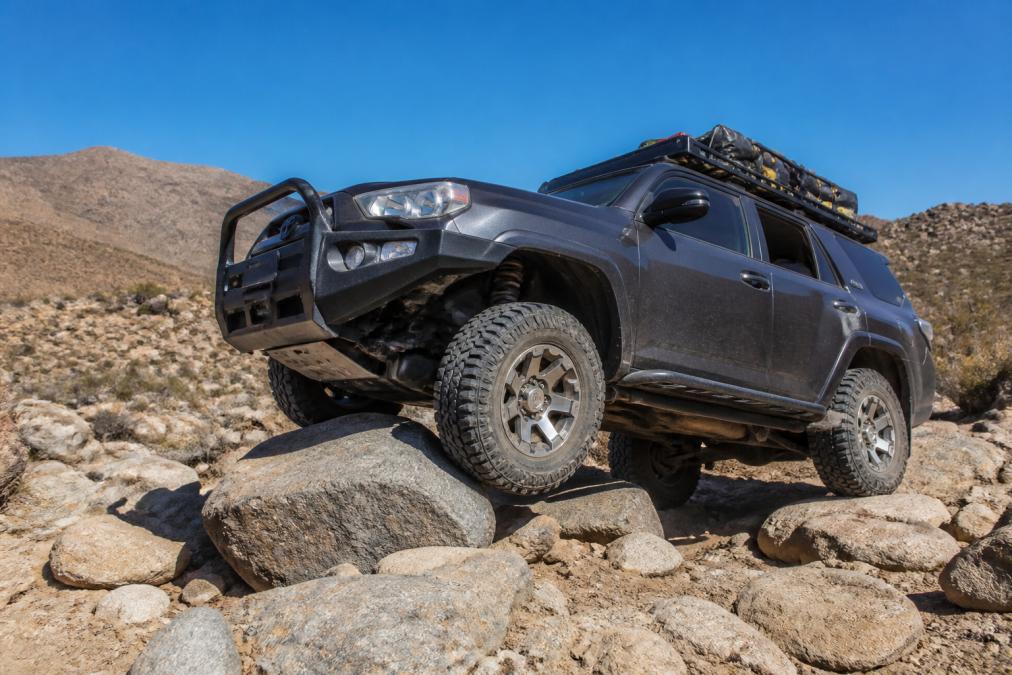
For rocky terrain, prioritize wheel travel and articulation. Stiffer springs and dampers keep your chassis higher and prevent bottoming out. Lower tire pressure lets the tire conform to rocks and improves traction.
In sand, softer suspension with more compliance lets your vehicle float across the surface. Lower tire pressure helps spread weight over more sand, reducing ground pressure.
Mud requires stiffer suspension to keep your vehicle higher so mud doesn't reach the undercarriage. Aggressive tread tires clear mud more effectively than all-terrain patterns.
Snow and ice demand predictable suspension behavior. Stiff suspension with controlled dampening prevents wallowing that can cause slides.
Most overlanders run a middle-ground setup that works reasonably well everywhere. If planning a trip to specific terrain, research what experienced overlanders use there and adjust accordingly. No single setup is perfect for all conditions.
Upgrading your SUV overlanding suspension transforms how your vehicle handles rough terrain and heavy loads. Start with a clear assessment of your current suspension condition and actual payload needs. Choose components matching your weight and intended terrain. Follow installation steps carefully, prioritize safety, and don't skip post-installation alignment. With proper maintenance and terrain-specific tuning, your upgraded suspension will handle backcountry challenges reliably.
Precision Upgrades carries premium overlanding components engineered for extended off-grid trips. From quality shocks and springs to complete suspension kits, every component is built to withstand the rigors of the trail. Shop Now and get 15% off your first order with newsletter signup.
Frequently Asked Questions
Q: What are the signs that my SUV needs a suspension upgrade?
A: Look for excessive body roll during turns, bottoming out over bumps, uneven tire wear, or a sagging ride height. If your vehicle dips noticeably when you load gear or passengers, or if the factory suspension struggles on rough terrain, it's time to upgrade. Worn bushings, leaking shocks, and a harsh ride over small bumps also indicate failing suspension components that affect both comfort and off-road capability.
Q: How do I know which suspension upgrade is right for my overlanding needs?
A: Start by calculating your vehicle's payload capacity and total weight distribution. Consider your primary use: highway comfort, light trails, or extreme off-road terrain. Coil springs offer better wheel travel for articulation, leaf springs provide load capacity, and airbags add adjustability. Match the spring rate and dampening to your vehicle's weight and intended terrain. Test different setups if possible before committing to a full upgrade.
Q: Can I upgrade my suspension without lifting my vehicle?
A: Yes. Upgrading shocks, springs, and bushings improves performance without changing ride height. You can replace factory components with higher-quality monotube shocks, stiffer spring rates, and better dampening to enhance comfort and handling. However, most overlanding builds combine suspension upgrades with a modest lift kit to increase ground clearance and wheel travel. The choice depends on your terrain, payload needs, and aesthetic preferences.
Q: How do I calculate payload for overlanding to ensure my suspension can handle it?
A: Find your vehicle's Gross Vehicle Weight Rating (GVWR) on the driver's door jamb. Subtract the vehicle's curb weight to get payload capacity. Account for passengers, fuel, water, recovery gear, and cargo. A typical overlanding build adds 500-1,500 pounds. If your total weight exceeds payload capacity, you need heavier-duty springs with a higher spring rate and stiffer dampening. Precision Upgrades can help you select components matched to your specific weight requirements.
This article was written using GrandRanker